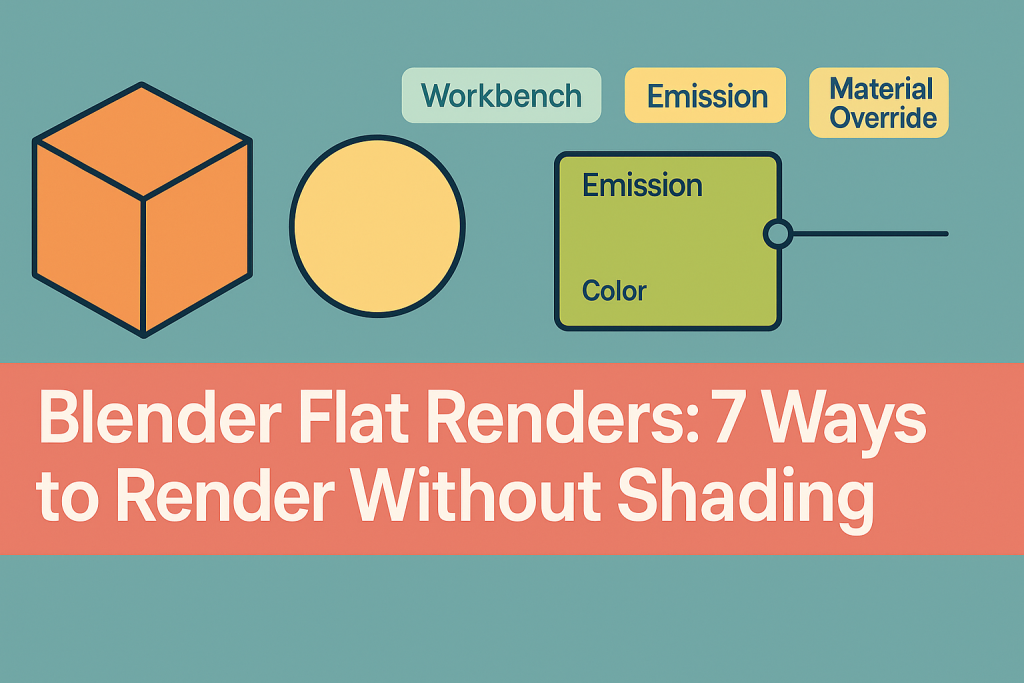
Introduction to Rendering Without Shading in Blender
In the world of 3D design and animation, Blender stands out as a powerful, versatile tool. Sometimes, creators want to achieve a flat, unshaded look — whether for line art, technical illustrations, or stylized animation. If you’re searching for the best ways to render in Blender without any shading, this guide provides a comprehensive overview of all the methods, tips, and creative uses for flat renders.
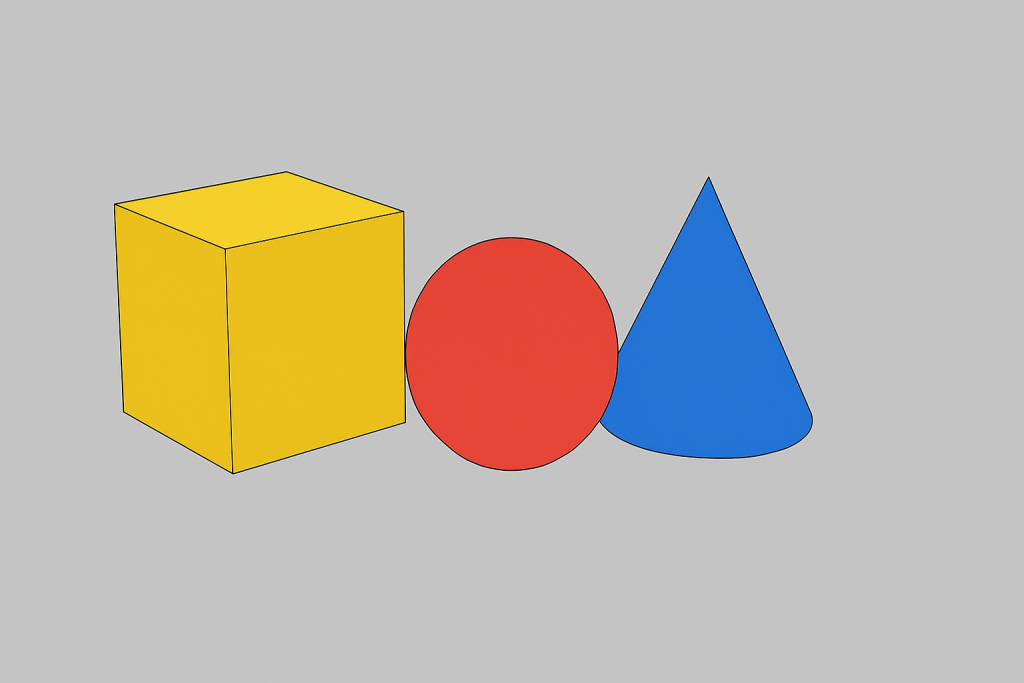
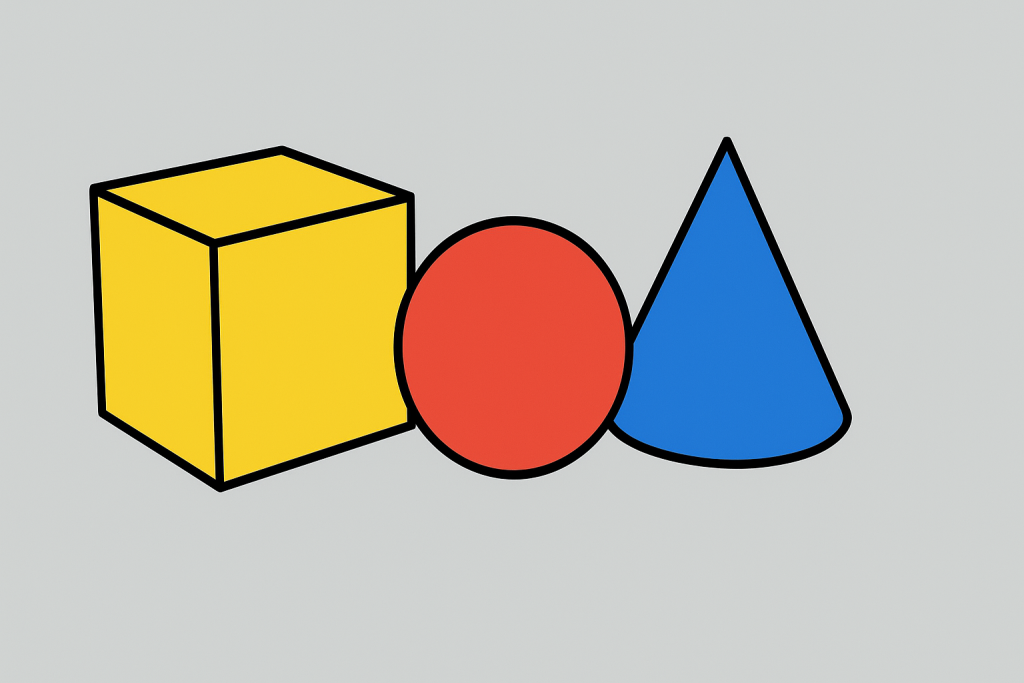
Rendering without shading means eliminating all shadow, gloss, and lighting information. The final output appears as pure, uniform colors — almost as if each object is a colored cut-out. This style is popular for blueprints, instruction manuals, comic books, or unique visual effects. Let’s explore seven effective solutions to achieve this look.
1. Using the ‘Flat’ Shading Mode in Blender
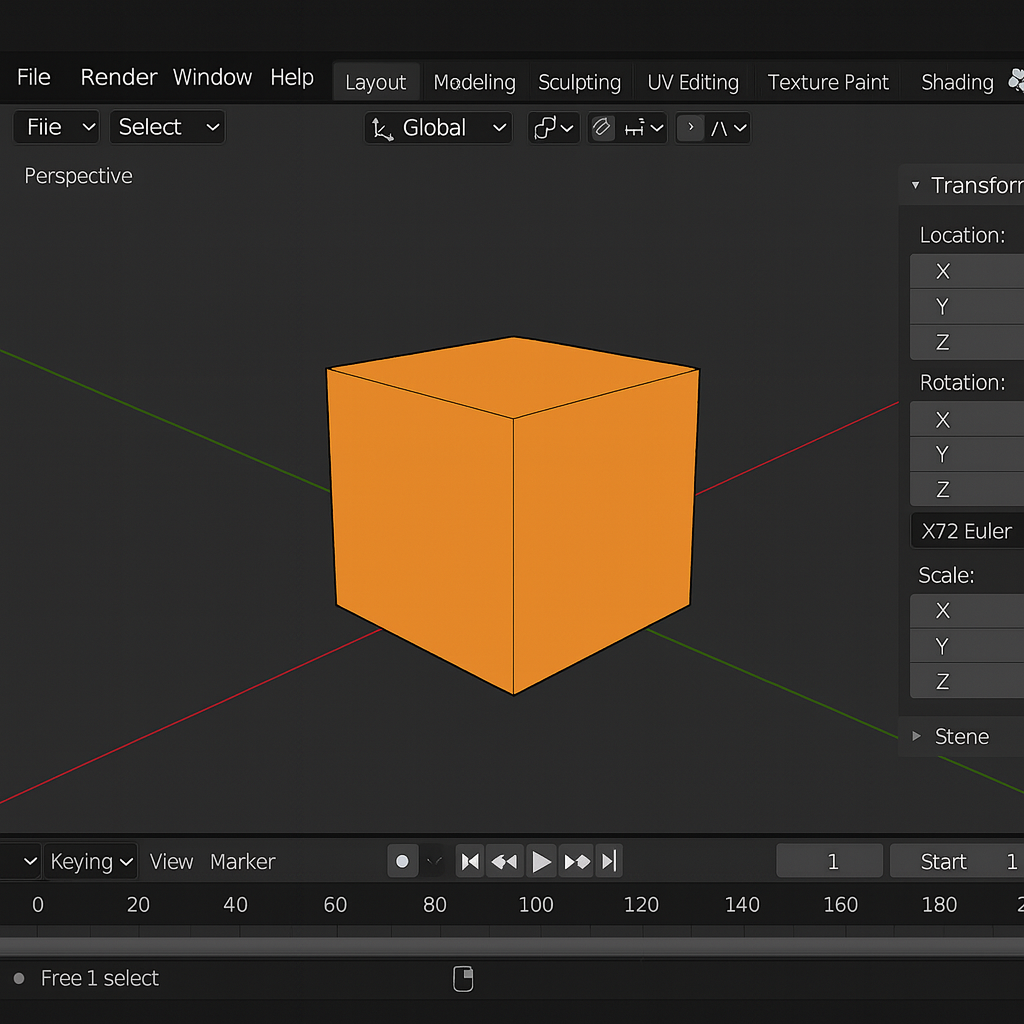
Blender offers a built-in ‘Flat’ shading mode, ideal for achieving a basic no-shading appearance. Instead of smoothing the surface, this mode ensures each polygon face appears as a single, solid color. However, it’s important to differentiate between Flat shading (which prevents smoothing) and no shading (which means no light, shadow, or gloss at all).
How to Apply Flat Shading
- Select your mesh object in the 3D viewport.
- Right-click and choose Shade Flat.
- The object now renders each face with a uniform tone, without smooth shading.
While this eliminates smoothing, you’ll still see lighting effects unless you further adjust material and render settings. For complete no-shading renders, read on for more advanced techniques.
2. Using an Emission Shader for Pure Color Renders
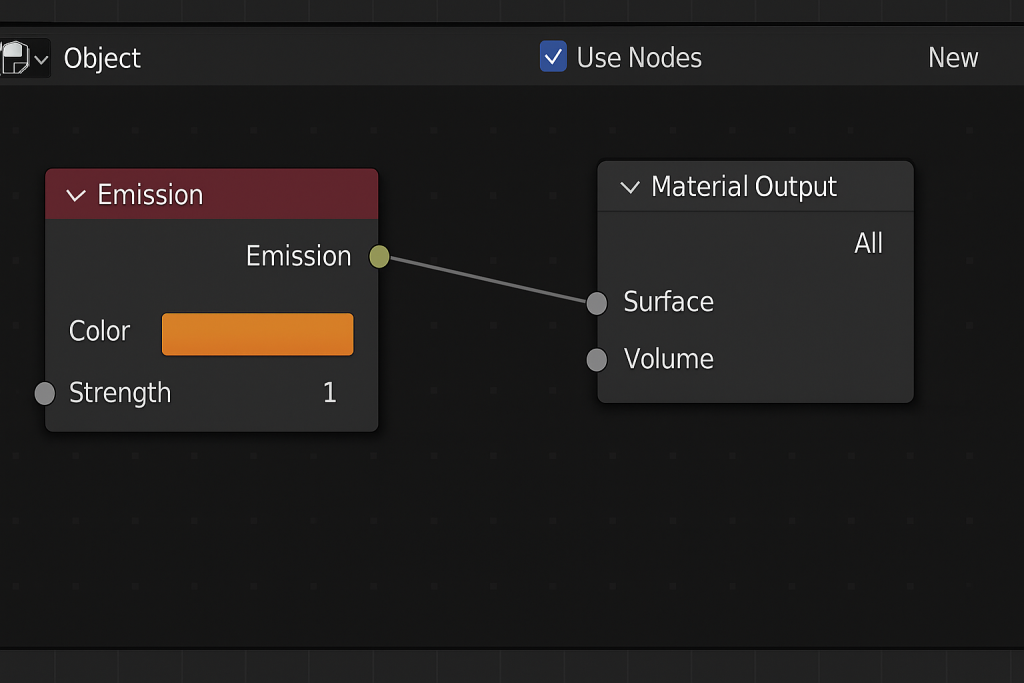
One of the most reliable ways to guarantee no shading or shadow in Blender is by using an Emission shader. This material emits its own light, so the render engine does not calculate shadows or lighting. The result is perfect, flat color — even in complex scenes.
Setting Up an Emission Shader
- Select the object and open the Shader Editor.
- Add a New Material, then search for ‘Emission’ in the Add menu (Shift + A > Shader > Emission).
- Connect the Emission node’s output directly to the Material Output node.
- Pick your desired color in the Emission node.
This technique works in both Cycles and Eevee render engines. For multiple objects, assign the same Emission material to each to keep colors consistent across your scene.
3. Disabling All Lights for a Shadowless Scene
If you want every object to render in pure, unlit color, you can eliminate all light sources in your scene. In Eevee and Cycles, objects will render black unless using an Emission shader. However, in Workbench Render Engine, objects will display their diffuse color without any lights present.
Using Workbench Render for No Shading
- Switch to the Workbench Render Engine in the Render Properties panel.
- In the Color settings, choose Material or Single color.
- Turn off Scene Lights and Scene World to avoid any external influence.
- Render your scene for a true flat color look.
Expert tip: The Workbench engine is perfect for quick previews, tech art, and stylized renders where shading is undesirable.
4. Overriding Scene Materials for Consistent Flat Color
For large or complex projects, you might require a method to force all objects to render with no shading—without manually reassigning materials. Blender offers a material override option in render layers (View Layers), making this process fast and efficient.
How to Override Materials in Blender
- Create a new flat Emission material as described above.
- In the View Layer Properties, find the Material Override field.
- Set your flat Emission material as the override.
- Render your scene—everything now appears in the flat override color, with no shading or lighting effects.
This is especially useful for preview renders, technical diagrams, or animation reference frames.
5. Utilizing the Freestyle NPR Engine for Line Art and Flat Colors
For those who want not just no shading, but also clear outlines and a stylized, hand-drawn effect, Blender’s Freestyle NPR (Non-Photorealistic Rendering) tools are invaluable. Proper configuration allows you to combine flat color fills with vector-style outlines for a truly unique output.
How to Enable and Use Freestyle
- Switch to either Eevee or Cycles render engine.
- In Render Properties, enable Freestyle.
- In the View Layer Properties, customize Freestyle settings for line thickness, color, and style.
- Combine this with flat Emission materials or Workbench settings.
Freestyle is popular for producing comic book art, technical illustrations, and stylized animation. By blending Freestyle lines with flat-filled areas, your renders will stand out with a clean, professional look.
6. Rendering Viewport Display with ‘Material Preview’ or ‘Flat’ Modes
Sometimes you need a quick export or snapshot of your scene without advanced rendering. Blender’s Viewport Render Image option allows you to capture the exact look of the viewport, including its flat color or wireframe display.
Steps for a Viewport Flat Render
- Set the viewport shading to Material Preview or Solid with flat colors.
- In the top menu, go to View > Viewport Render Image.
- Save the result for use in documentation, animatics, or quick previews.
This method is ideal for concept art, blueprints, or rapid prototyping where lighting and shading are unnecessary.
7. Advanced: Custom Node Setups for Special Flat Rendering Effects
For special creative needs, you can build custom node setups in Blender’s Shader Editor to force flat, unshaded results—even introducing unique visual twists.
Examples of Custom Node Networks
- Flat Color with Alpha: Use an Emission shader combined with a Transparent shader, controlled by a Mix node, to create flat renders with custom transparency.
- Flat Color with Texture: Plug a texture node directly into an Emission shader for crisp, shadowless colored images.
- Masking and Color ID: For compositing, use solid Emission materials for each object to render color ID passes—helpful in post-production.
Custom node setups allow for endless experimentation. By bypassing lighting entirely, your renders are consistent and stylized, regardless of scene complexity.
Tips and Best Practices for No-Shading Blender Renders
- Use the Emission shader for guaranteed flat colors across render engines.
- Leverage Workbench for fast, pure previews without extra setup.
- Override materials for batch or large-scene processing.
- Use Freestyle to add outlines for stylized or technical renders.
- Viewport rendering is best for fast documentation or rough drafts.
Always test your setup with a quick render before committing to a full animation or final export. Keep your workflow organized by naming materials clearly and grouping override setups in the Outliner for easy access.
Creative Applications for Flat, No-Shading Renders
No-shading renders aren’t just for technical illustrations. Many artists and designers incorporate this look into:
- Blueprints or schematics
- Comic and manga-style panels
- Game texture maps
- Animation storyboards
- Infographics and educational material
By mastering these techniques, you can significantly expand your creative toolbox and produce renders that are both visually striking and practical for various industries.
Conclusion: Mastering Flat Color Rendering in Blender
Blender’s flexibility allows you to create flat, no-shading renders using several proven techniques—from Emission shaders and material overrides to viewport tricks and Freestyle outlines. Whether you’re creating stylized art, technical diagrams, or animation assets, these methods will streamline your workflow and unlock new visual possibilities. Experiment with each method to find the best fit for your project, and enjoy the clarity and impact of clean, unshaded renders!