Why Access iCloud Email on Android? Key Benefits and Challenges
Many users find themselves transitioning from Apple to Android devices, or using both ecosystems simultaneously. One of the biggest hurdles in this process is ensuring seamless access to important services like iCloud email. If your primary email address ends in @icloud.com, @me.com, or @mac.com, staying connected on your Android device is crucial for communication, productivity, and data continuity.
Apple does not provide a dedicated iCloud app for Android. However, the good news is that with the right setup, you can easily access iCloud email on Android phone or tablet. In this comprehensive guide, we’ll uncover the most effective methods, step-by-step instructions, and helpful tips to make the process effortless and secure.
Understanding iCloud Email: How It Works
Before diving into setup instructions, it’s important to understand how iCloud Mail functions. iCloud Mail uses standard protocols like IMAP, which means it is compatible with most modern email clients—including those available on Android devices. By correctly configuring your mail client with the appropriate settings, you can send, receive, and sync emails just like you would on an Apple device.
Here are some key points about iCloud Mail:
- Uses IMAP (Internet Message Access Protocol) for syncing messages and folders
- Supports two-factor authentication for added security
- Requires an app-specific password if two-factor authentication is enabled
7 Easy Steps to Access iCloud Email on Android
Follow these straightforward steps to add your iCloud email account to your Android device. Whether you use Gmail, Outlook, or another email app, these instructions will work for most popular clients.
Step 1: Generate an App-Specific Password (If Using Two-Factor Authentication)
If your Apple ID has two-factor authentication enabled, you’ll need to create an app-specific password to use your iCloud email in any third-party email app. Here’s how:
- Go to appleid.apple.com and sign in with your Apple ID.
- Under “Sign-In and Security,” select “App-Specific Passwords.”
- Click “Generate an app-specific password.”
- Follow the instructions and copy the generated password. You’ll use this instead of your regular Apple ID password during setup.
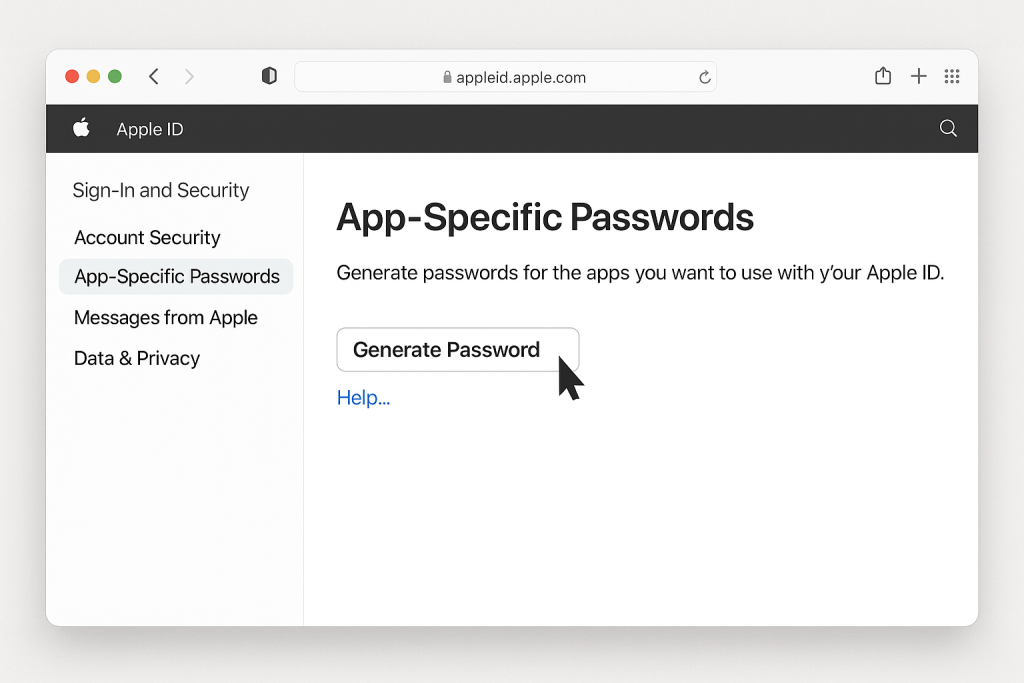
Tip: If you do not use two-factor authentication, you can enter your regular Apple ID password, but enabling 2FA is highly recommended for security.
Step 2: Open Your Preferred Email App on Android
Most Android devices come pre-installed with the Gmail app, but you can use any third-party email client that supports IMAP. Some top choices include:
- Gmail
- Outlook
- BlueMail
- Samsung Email
- Microsoft Outlook
For this guide, we’ll focus on the Gmail app, but the steps are similar for other clients.
Step 3: Add a New Email Account
Open the app and navigate to account settings. In Gmail:
- Tap the three-line menu (☰) in the upper left corner.
- Scroll down and select “Settings.”
- Tap “Add account.”
- Choose “Other” (not Google, Outlook, etc.).
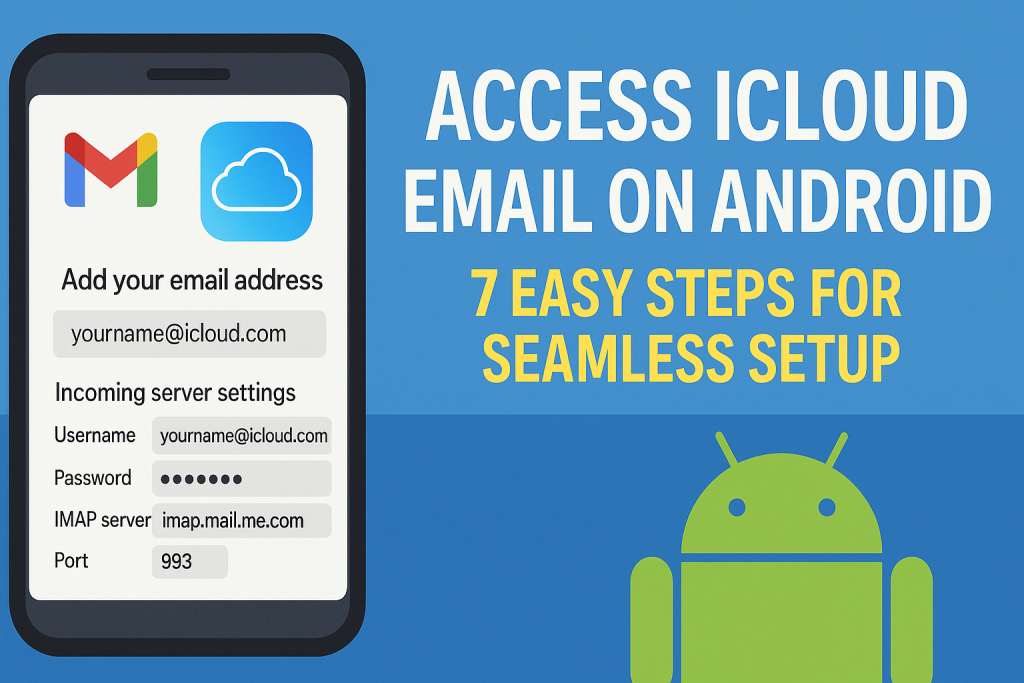
Step 4: Enter Your iCloud Email Address
When prompted, enter your full iCloud email address (e.g., [email protected]). Tap “Next” to proceed.
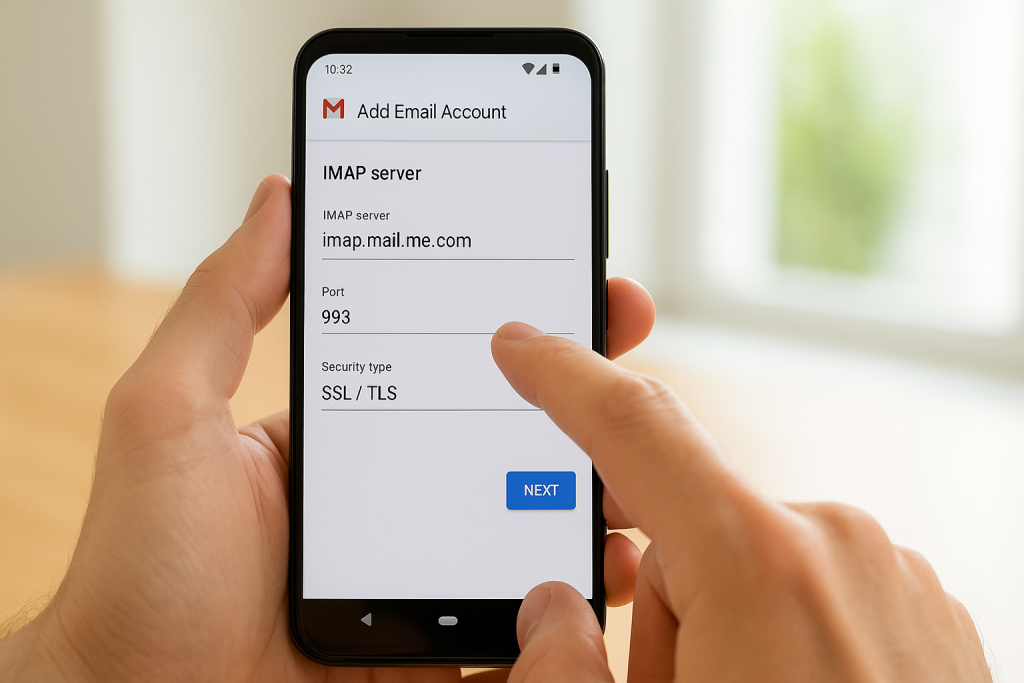
Step 5: Configure Incoming Server Settings
Choose the IMAP option when asked for account type. Enter the following details:
- Username: your full iCloud email address
- Password: your app-specific password (see Step 1)
- IMAP server: imap.mail.me.com
- Port: 993
- Security type: SSL/TLS
Double-check all fields before continuing. Inaccurate information will prevent successful login.
Step 6: Configure Outgoing Server Settings
Now enter the SMTP server information:
- SMTP server: smtp.mail.me.com
- Port: 587
- Security type: STARTTLS (or TLS/SSL)
- Username: your full iCloud email address
- Password: your app-specific password
Tap “Next” to finish the setup. Most email clients will attempt to verify your account at this stage.
Step 7: Finalize and Sync Your Account
After successful verification, you can customize sync settings, notification preferences, and display options. Your iCloud email will now appear in your inbox alongside any other email accounts you’ve added.
- Enable automatic sync for real-time updates
- Organize folders and labels for efficient management
- Set up signatures or filters as needed
Congratulations! You have now successfully added your iCloud email to your Android device.
Alternative Methods: Access iCloud Mail via Web and Third-Party Apps
While the IMAP method is the most robust, there are alternative ways to check your iCloud email from Android:
Using iCloud Webmail on Android Browser
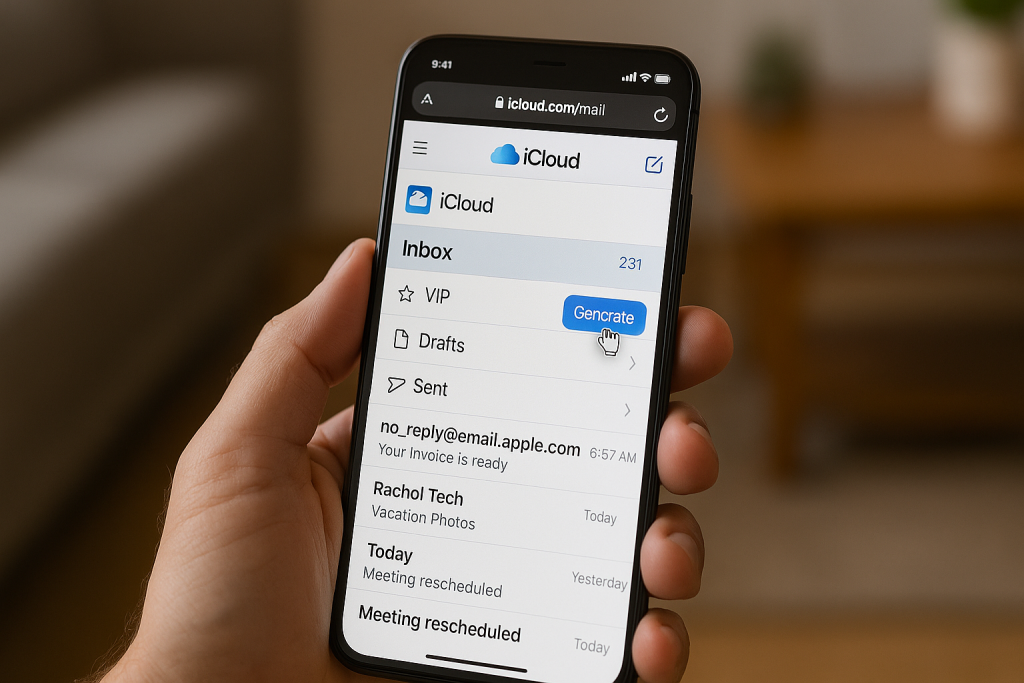
You can access your iCloud email directly through any web browser on your Android phone. Simply visit icloud.com/mail and log in with your Apple ID credentials. The mobile site is user-friendly and offers most essential email features.
This is a handy option if you only need occasional access, or if you do not wish to set up your email client with IMAP settings.
Third-Party Apps Designed for iCloud Mail
Certain third-party email apps on the Play Store offer built-in templates for iCloud Mail, simplifying setup. Examples include BlueMail, Nine, and TypeApp. These apps often provide advanced features such as unified inboxes, enhanced notifications, and custom filters for power users.
Always ensure you download apps from reputable sources and review permissions before granting access to your email account.
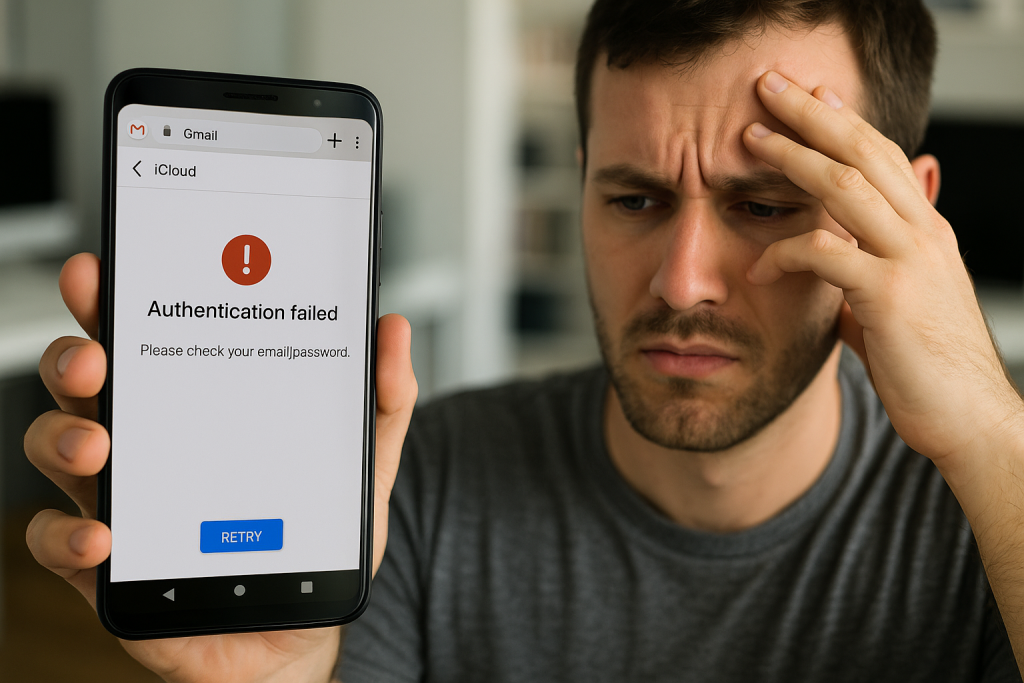
Troubleshooting Common iCloud Email Setup Issues
It’s not uncommon to encounter setup glitches while connecting iCloud email on Android. Here are some tips for resolving common problems:
- Authentication Errors: Verify that you’re using an app-specific password, not your regular Apple ID password.
- Server Not Responding: Double-check IMAP and SMTP server settings. Typos in server addresses or ports are a frequent culprit.
- Unable to Sync: Ensure your device is connected to the internet and has the latest version of your email app installed.
- Two-Factor Authentication Issues: Make sure you have generated a new app-specific password if you have recently changed Apple ID security settings.
If all else fails, try removing the account and repeating the setup process from scratch, or consult the official support resources for your specific email client.
Expert Tips for a Smooth iCloud Email Experience on Android
To maximize your productivity and maintain security while using iCloud email on Android, consider the following expert tips:
- Regularly update your Android device and email app for enhanced security and compatibility.
- Enable “two-factor authentication” on your Apple ID for added protection against unauthorized access.
- Use a strong, unique Apple ID password and update it periodically.
- Periodically review third-party app access on your Apple ID account.
- Set up email filters or rules within your email client to better organize incoming messages.
By following these proven strategies, you’ll enjoy uninterrupted access to your important emails, no matter which device you use.
Frequently Asked Questions (FAQ) About iCloud Email on Android
Can I access my iCloud contacts and calendars on Android?
While this guide focuses on iCloud email, you can also sync contacts and calendars with additional setup steps using CardDAV and CalDAV protocols. Many third-party apps support these functions.
Is it safe to access iCloud email on Android?
Yes, as long as you use official email clients and follow security best practices, accessing iCloud email on Android is secure. Always use app-specific passwords and enable two-factor authentication for maximum protection.
Will my iCloud email sync in real time on Android?
If you use IMAP and enable automatic sync in your email app, your messages and folders should stay up-to-date in real time.
Conclusion: Enjoy Effortless iCloud Email Access on Your Android Device
Switching to Android doesn’t mean losing access to your iCloud email. By following the essential 7-step setup guide and using the expert tips provided, you can seamlessly manage your iCloud mail on any Android device. Whether you prefer using built-in email clients, the web, or third-party apps, your mail will always be at your fingertips—helping you stay productive, connected, and organized.