Why Build an Outdoor Kitchen?
An outdoor kitchen is more than just a luxury—it’s a functional extension of your living space that can transform your backyard into a culinary and social hub. Whether you want to entertain guests, enjoy family dinners under the stars, or simply maximize your home’s value, adding an outdoor kitchen brings unmatched benefits.
According to the National Association of Realtors, outdoor kitchens can boost your home’s resale value by up to 30%. Besides increasing property value, they also promote healthier eating by making grilling and fresh cooking more accessible. With thoughtful planning, you can create an outdoor culinary space that enhances your lifestyle all year round.

Step 1: Planning Your Outdoor Kitchen
Assess Your Space and Needs
Before you break ground, evaluate your backyard layout. Consider the proximity to your indoor kitchen, access to utilities (water, gas, electricity), and the amount of available space. Create a wish list: Do you need a simple grill station or a fully-equipped kitchen with a sink, fridge, and pizza oven?
Set a Realistic Budget
Outdoor kitchens range from a few thousand to tens of thousands of dollars. Consider these key costs:
- Appliances (grill, refrigerator, sink)
- Countertops and cabinetry
- Plumbing and electrical work
- Flooring and patio materials
- Labor (if using contractors)
Include a 10-20% buffer for unexpected expenses to stay on track.
Step 2: Choose the Right Location
Accessibility and Flow
Place your kitchen close to your indoor kitchen for convenience. This makes it easier to transport food and supplies, reducing walking distance and improving workflow.
Wind, Sun, and Shelter
Consider natural elements. Position your grill away from prevailing winds and ensure that smoke won’t blow into seating areas or your home. Use pergolas, awnings, or outdoor umbrellas for shade and protection from rain, extending your outdoor cooking season.
Step 3: Select Durable Materials and Appliances
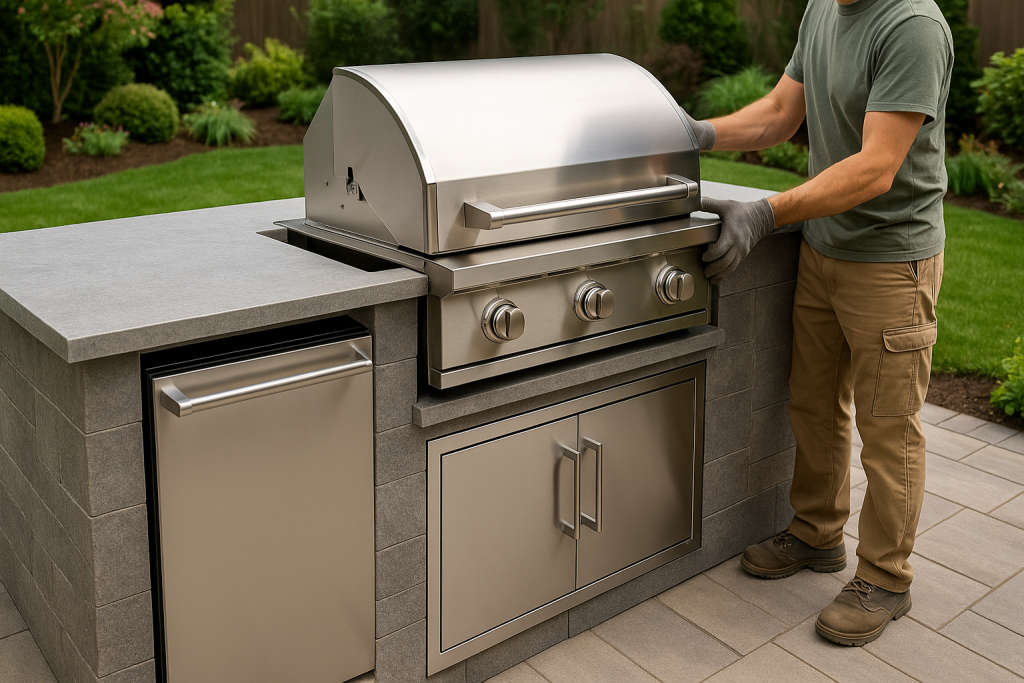
Best Materials for Outdoor Kitchens
Outdoor kitchens must withstand the elements. Opt for weather-resistant materials like:
- Stainless Steel: Rust-resistant and easy to clean, ideal for appliances and cabinetry.
- Stone or Brick: Classic look and superior durability for bases and countertops.
- Concrete: Modern, customizable, and resilient for both flooring and counters.
Choose the Right Appliances
Invest in outdoor-rated appliances designed for heat, rain, and temperature fluctuations. Popular options include:
- Gas, charcoal, or pellet grills
- Outdoor refrigerators and ice makers
- Side burners and pizza ovens
- Sinks with weatherproof plumbing
Select energy-efficient models for long-term savings.
Step 4: Design Your Layout for Function and Style
Outdoor Kitchen Zones
Professional designers recommend dividing your outdoor kitchen into dedicated zones for prep, cooking, serving, and cleaning. This enhances safety and makes outdoor cooking a breeze. Place the grill near your prep area but separate from seating for better traffic flow.
Storage and Counter Space
Ample countertop space is crucial for food prep and serving. Incorporate built-in cabinets or weatherproof storage drawers to keep utensils and cleaning supplies organized. Opt for non-porous, easy-to-clean surfaces like granite or sealed concrete to make maintenance simple.
Step 5: Install Utilities Safely
Plumbing and Electrical Considerations
All outdoor kitchens require safe connections for water, electricity, and, if desired, natural gas. Hire licensed professionals to ensure your installation meets local building codes and safety standards. Plan for:
- Outdoor-rated electrical outlets and lighting
- Water lines for sinks and ice machines
- Gas lines for grills and side burners
Lighting for Ambience and Safety
Install task lighting for cooking areas and ambient lighting for dining and seating zones. LED fixtures are energy-efficient and long-lasting, perfect for outdoor use. Consider motion sensors or smart lighting systems to enhance safety and convenience.
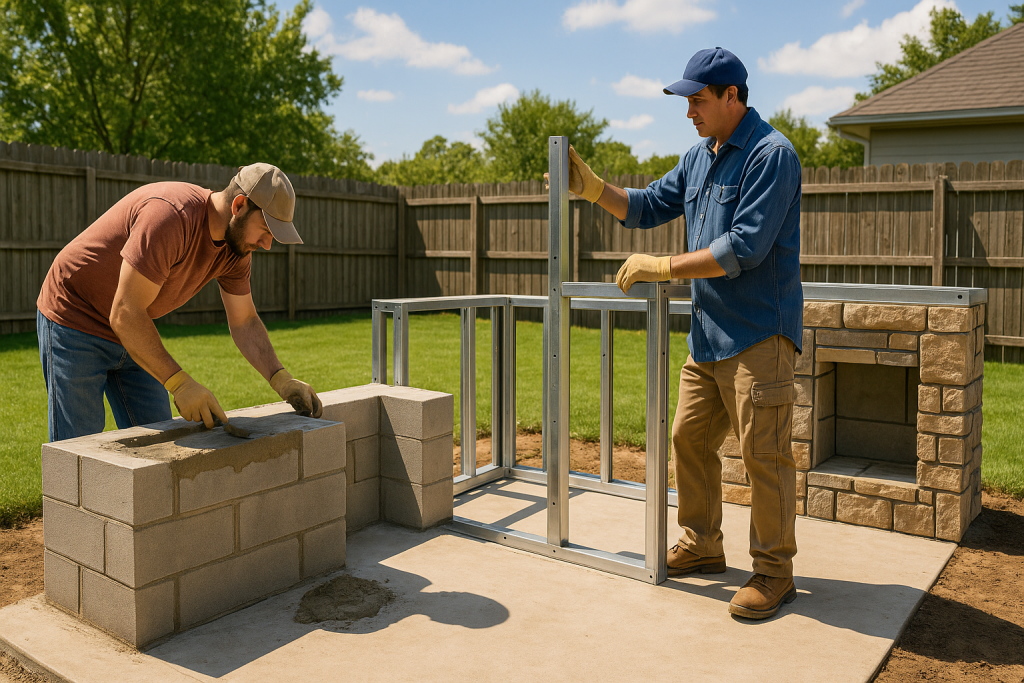
Step 6: Build the Foundation and Structure
Patio and Flooring Options
A stable, level surface is essential. Popular flooring choices include:
- Pavers: Easy to install and repair, with countless design options.
- Stamped Concrete: Custom patterns simulate stone or brick.
- Natural Stone: Elegant but pricier; ensures a premium look.
Ensure proper drainage and slip resistance, especially near water features.
Constructing the Kitchen Framework
Use weatherproof framing materials such as treated lumber, metal studs, or concrete block. Follow manufacturer instructions for appliance installation—especially grills and ovens that need heat-resistant backing and ventilation.
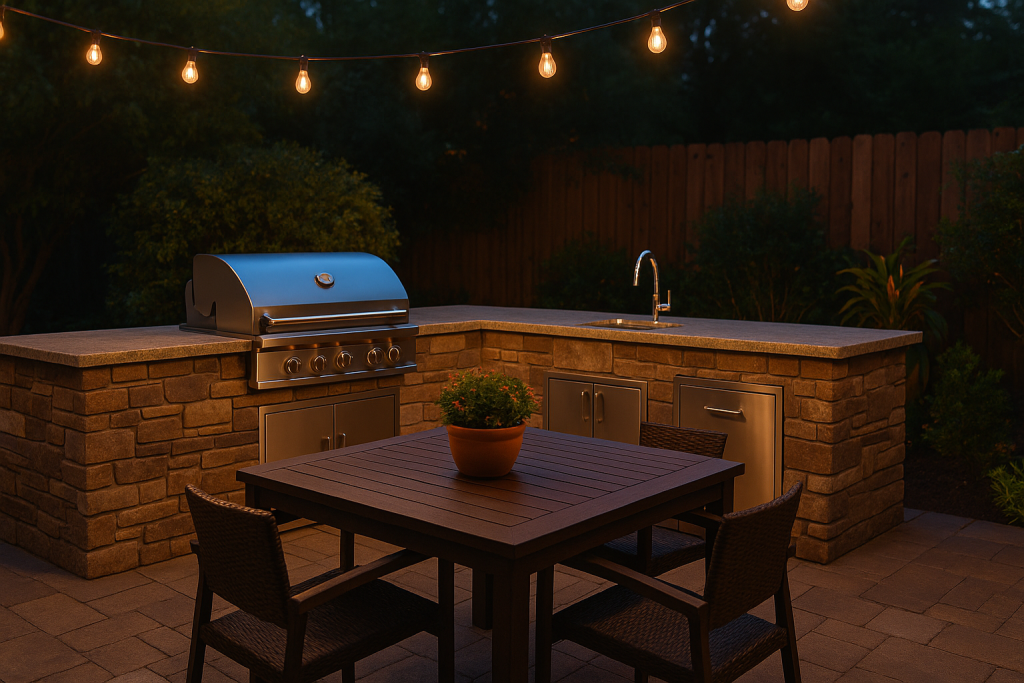
Step 7: Add Finishing Touches and Personalize
Decor and Comfort Features
Enhance your outdoor kitchen with personal touches:
- Comfortable seating and dining sets
- Outdoor rugs and cushions
- Planters, string lights, or fire features
- Weatherproof speakers for music
Weather Protection and Maintenance
Invest in high-quality covers for appliances and furniture to extend their lifespan. Regularly clean surfaces and check for signs of wear or rust. Seal countertops yearly to protect against sun and rain.
Expert Tips for a Successful Outdoor Kitchen Project
- Start simple: If you’re on a budget, begin with a grill and counter, then upgrade over time.
- Plan for expansion: Leave space for extra appliances or features you might want later.
- Get permits: Always check local codes and obtain necessary building permits before starting construction.
- Incorporate eco-friendly features: Add a compost bin, use LED lighting, or install a rainwater collection system.
Common Outdoor Kitchen Mistakes to Avoid
- Ignoring the climate: Choose materials and appliances designed for your local weather conditions.
- Underestimating storage: You’ll need more storage for utensils, ingredients, and cleaning supplies than you might expect.
- Neglecting ventilation: Proper venting is essential for grills and gas appliances to prevent safety hazards and smoke build-up.
- Forgetting the seating area: Make sure there’s comfortable, shaded space for guests to relax and dine.
Conclusion: Enjoy Your Dream Outdoor Kitchen
Building an outdoor kitchen is a rewarding project that adds value, functionality, and fun to your backyard. By following these 7 essential steps, you can create a personalized cooking and entertaining space that fits your needs and style. Whether you’re a DIY enthusiast or hiring professionals, careful planning and quality materials will ensure your outdoor kitchen stands the test of time—and becomes the go-to spot for gatherings, meals, and memories in every season.