Why Cleaning Your Beauty Blender is Essential
A Beauty Blender is a must-have tool for anyone who loves makeup, offering a seamless and airbrushed finish that traditional brushes often struggle to achieve. However, while most people focus on perfecting their blending techniques, they often overlook a crucial step—keeping their sponge clean. Over time, as the sponge repeatedly absorbs foundation, concealer, and other products, it also traps dirt, oil, and dead skin cells. If left unwashed, this buildup creates the perfect environment for bacteria to thrive, turning your once-trusty Beauty Blender into a hidden culprit behind breakouts, clogged pores, and skin irritation. Additionally, a dirty sponge doesn’t perform as well—residue buildup can cause streaky or patchy makeup application, preventing you from achieving that flawless, even finish. To maintain both the longevity of your Beauty Blender and the health of your skin, regular cleaning should be a non-negotiable part of your beauty routine.
Benefits of Cleaning Your Beauty Blender Regularly
✔️ Better Hygiene – Removes dirt, oil, and bacteria that accumulate over time.
✔️ Improved Makeup Application – A clean sponge blends makeup more evenly for a flawless finish.
✔️ Longer Lifespan – Proper maintenance prevents deterioration and extends usability.
✔️ Prevents Breakouts – A dirty sponge transfers bacteria to your skin, leading to acne and irritation.
How Often Should You Clean Your Beauty Blender?
- Daily (After Each Use): A quick rinse removes excess makeup and prevents buildup.
- Weekly (Deep Clean): Removes embedded makeup, bacteria, and stubborn stains.
- Every 3-6 Months: Even with proper cleaning, Beauty Blenders wear out over time and should be replaced.
💡 Tip: If your Beauty Blender starts to smell bad, feels stiff, or has visible tears, it’s time to replace it!
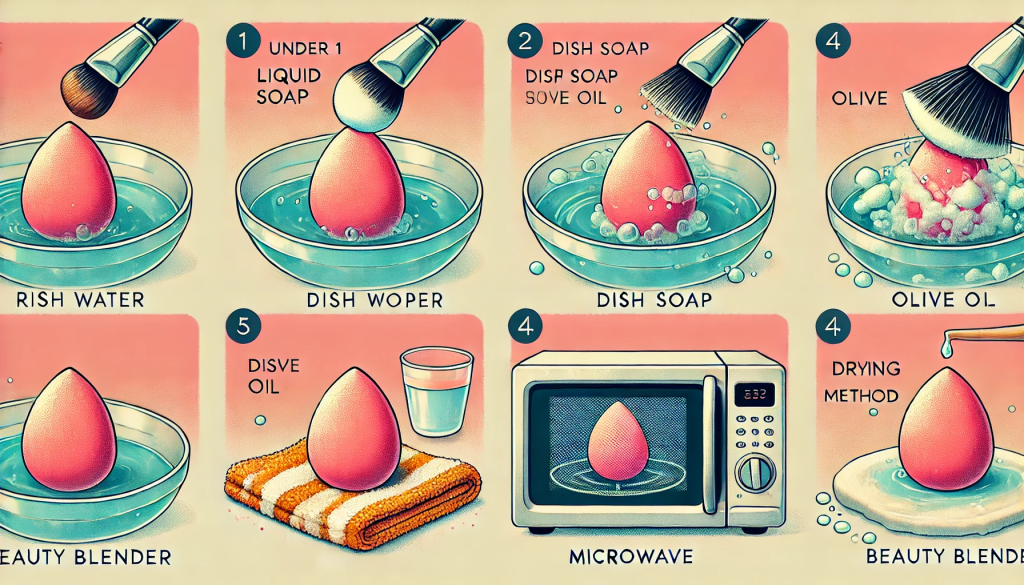
Best Methods to Clean a Beauty Blender
Cleaning your Beauty Blender properly is essential for maintaining its performance and hygiene, and the good news is that there are several effective methods to do so. Whether you’re looking for a quick daily refresh or a deep cleansing session to remove stubborn makeup buildup, there’s a technique suited to your needs. The best approach depends on how much time you have, the level of dirt and residue in your sponge, and the cleaning products you prefer to use. Below, we break down the most efficient and practical cleaning methods, so you can keep your Beauty Blender in top condition with minimal effort.
1. Quick Daily Clean: Using a Gentle Cleanser
(Best for daily maintenance to keep your sponge fresh)
✅ What You Need:
- A mild liquid soap or baby shampoo
- Warm water
- A clean towel
Steps:
- Wet the sponge thoroughly with warm water.
- Apply a few drops of liquid soap directly onto it.
- Gently massage and squeeze the sponge to work up a lather.
- Rinse under running water until all the soap and makeup residue is gone.
- Squeeze out excess water and let it air dry on a clean towel.
📝 Why It Works: This method is quick and easy, keeping your Beauty Blender fresh without deep cleaning every day.
2. Deep Cleaning with Olive Oil & Dish Soap
(Best for removing heavy foundation and stubborn stains)
✅ What You Need:
- 1 teaspoon of dish soap
- 1 teaspoon of olive oil
- Warm water
Steps:
- Mix dish soap and olive oil in a small bowl.
- Dip your Beauty Blender into the mixture and gently massage it to break down makeup residue.
- Rinse thoroughly with warm water, squeezing the sponge repeatedly until clean.
- Let it air dry completely before using it again.
💡 Why Olive Oil? It helps break down oil-based makeup and keeps your sponge soft, preventing it from drying out.
3. Microwave Method: Kill Bacteria Effectively
(Best for sanitizing and eliminating bacteria quickly)
✅ What You Need:
- A microwave-safe cup
- Water
- A drop of liquid soap
Steps:
- Fill the cup with warm water and add a few drops of soap.
- Submerge your Beauty Blender completely in the soapy water.
- Microwave the cup for 1 minute (the water should be steaming).
- Carefully remove the cup (it will be hot) and let the sponge cool down.
- Rinse it under running water and squeeze out excess moisture.
⚠️ Warning: Let the sponge cool before touching it to avoid burns.
💡 Why It Works: The heat from the microwave kills bacteria, making it a great method for sanitization.
4. Using a Solid Cleanser (Beauty Blender Official Cleanser)
(Best for quick and effective deep cleaning)
✅ What You Need:
- A solid brush/sponge cleanser (like Beauty Blender’s official cleanser)
- Warm water
Steps:
- Wet your Beauty Blender thoroughly with warm water.
- Rub the sponge against the solid cleanser to create a lather.
- Squeeze and massage the sponge to remove dirt and makeup.
- Rinse under running water until the water runs clear.
- Let it air dry completely before use.
💡 Why It’s Effective: Solid cleansers are designed to break down heavy makeup residue without damaging the sponge.
How to Properly Dry Your Beauty Blender
Properly drying your Beauty Blender is just as crucial as cleaning it, as any leftover moisture can create the perfect breeding ground for bacteria and mold. A damp sponge trapped in an enclosed or poorly ventilated space can quickly become a hygiene hazard, leading to unpleasant odors and even potential skin issues. To ensure your Beauty Blender remains fresh and safe to use, it’s essential to let it dry completely in a clean, well-ventilated area. Taking the time to dry it properly not only prevents contamination but also helps maintain the sponge’s texture and longevity, ensuring flawless makeup application every time.
Best Drying Methods:
✔️ Place it on a clean towel in a well-ventilated area.
✔️ Use a Beauty Blender stand to improve airflow.
✔️ Avoid sealing it in a closed container before it is completely dry.
🚫 What NOT to Do:
❌ Don’t use a hairdryer—it can damage the sponge.
❌ Don’t store it in an airtight container while damp.
When to Replace Your Beauty Blender
Even with proper care, your Beauty Blender won’t last forever. Here are some signs that indicate it’s time to replace it:
❌ Visible Tears or Holes – A damaged sponge won’t blend makeup properly.
❌ Doesn’t Expand Properly – If it no longer becomes soft and bouncy when wet, it’s time to get a new one.
❌ Persistent Stains or Bad Odor – If your sponge still looks dirty or smells bad after washing, replace it.
❌ More than 3-6 Months Old – Over time, bacteria build up even with regular cleaning.
📌 Solution: To maintain flawless makeup application, replace your Beauty Blender every 3-6 months.
Final Thoughts
Cleaning your Beauty Blender is essential for maintaining healthy skin, achieving a flawless makeup look, and extending the lifespan of your sponge. Whether you prefer a quick daily cleanse or a deep cleaning session, following these methods will keep your Beauty Blender fresh and bacteria-free.
💬 Have a favorite cleaning method? Let us know in the comments!