Why Clearing Safari History on Your iPhone Matters
Your Safari browsing history holds information about the websites you visit, searches you perform, and even the data you fill in online forms. While this can be convenient for quick access to previous sites, it also poses potential risks to your privacy and security.
For many iPhone users, the importance of clearing Safari history goes beyond just tidying up. It helps prevent others from accessing your browsing activity, protects sensitive information, and can even help resolve issues like slow browser performance and loading errors. According to a 2023 Pew Research study, nearly 70% of smartphone owners are concerned about their digital privacy, making this a critical habit to adopt.
In this guide, you’ll discover step-by-step instructions, advanced tips, and best practices to keep your iPhone browsing history private and your device running smoothly.
Understanding What Gets Deleted When You Clear Safari History
Before you proceed, it’s vital to know exactly what happens when you clear Safari history on your iPhone. This action can impact more than just your recent websites.
- Browsing History: All records of websites visited are erased.
- Cookies: Login details, site preferences, and tracking data are removed.
- Cache: Stored files, images, and scripts that speed up website loading times are deleted.
- Autofill Information: Sometimes, saved form data may be affected.
It’s important to remember that these actions are local to your iPhone. If you use iCloud and have Safari enabled for syncing, the history will be deleted across all connected devices signed in to the same Apple ID.
How to Clear Safari History on Your iPhone: Step-by-Step Guide
Step 1: Open the Settings App
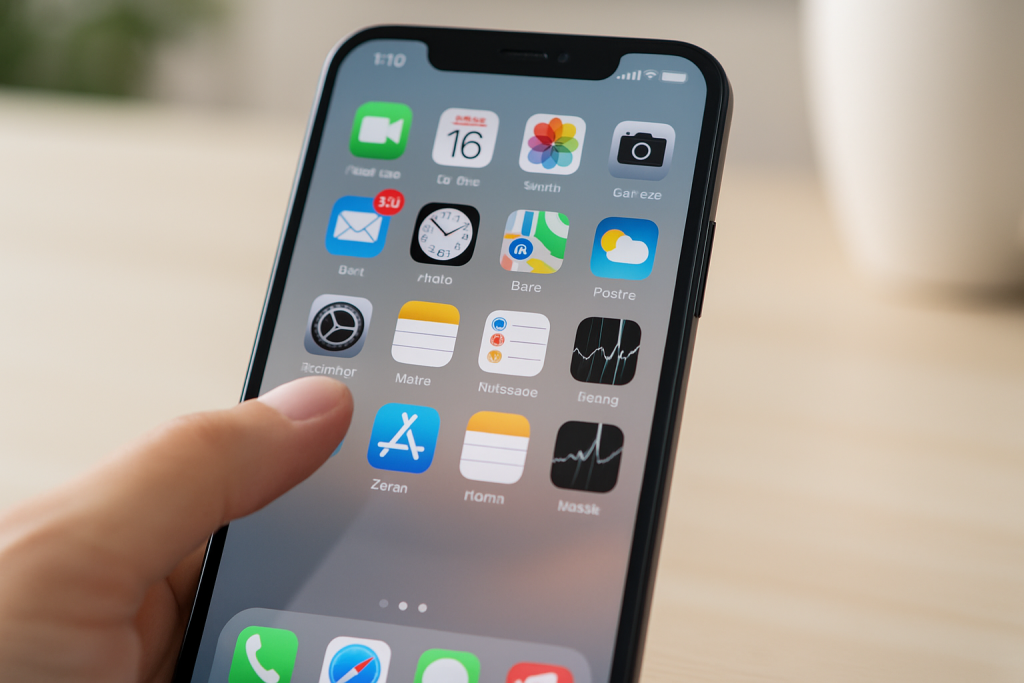
Begin by unlocking your iPhone and locating the Settings app on your home screen. This is where you’ll find all privacy and browser settings for Safari.
Step 2: Scroll Down and Tap “Safari”
Within the Settings menu, scroll down until you see the Safari option. Tapping this will open a new window dedicated to browser settings, privacy controls, and advanced options.
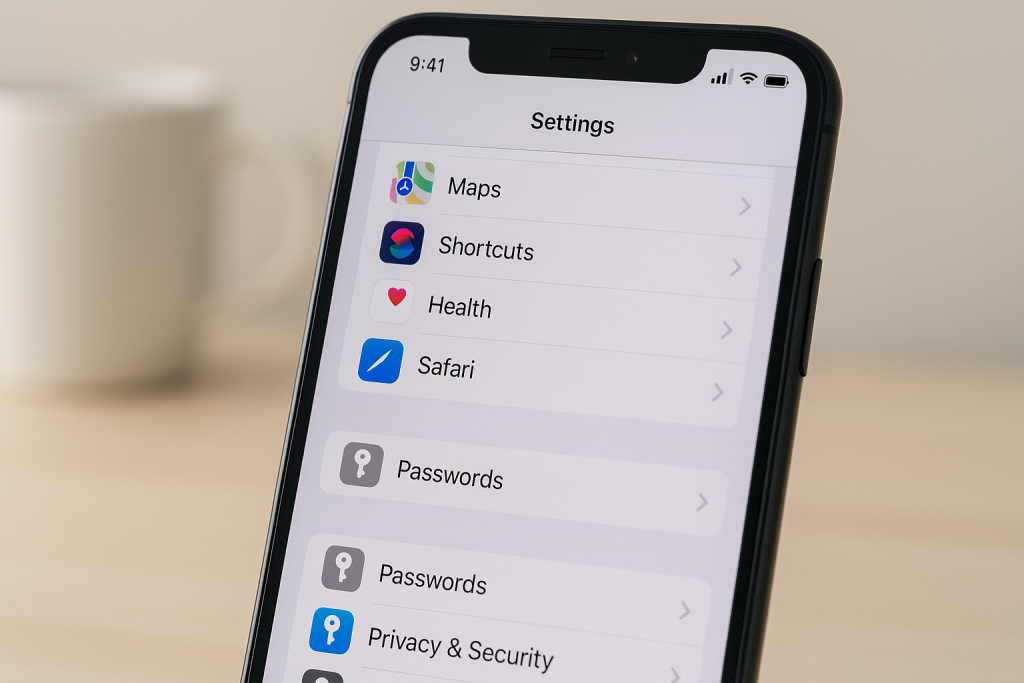
Step 3: Select “Clear History and Website Data”
Look for the blue-text button labeled “Clear History and Website Data”. This is located about halfway down the Safari settings page. Tapping it will prompt a confirmation box to prevent accidental deletion.
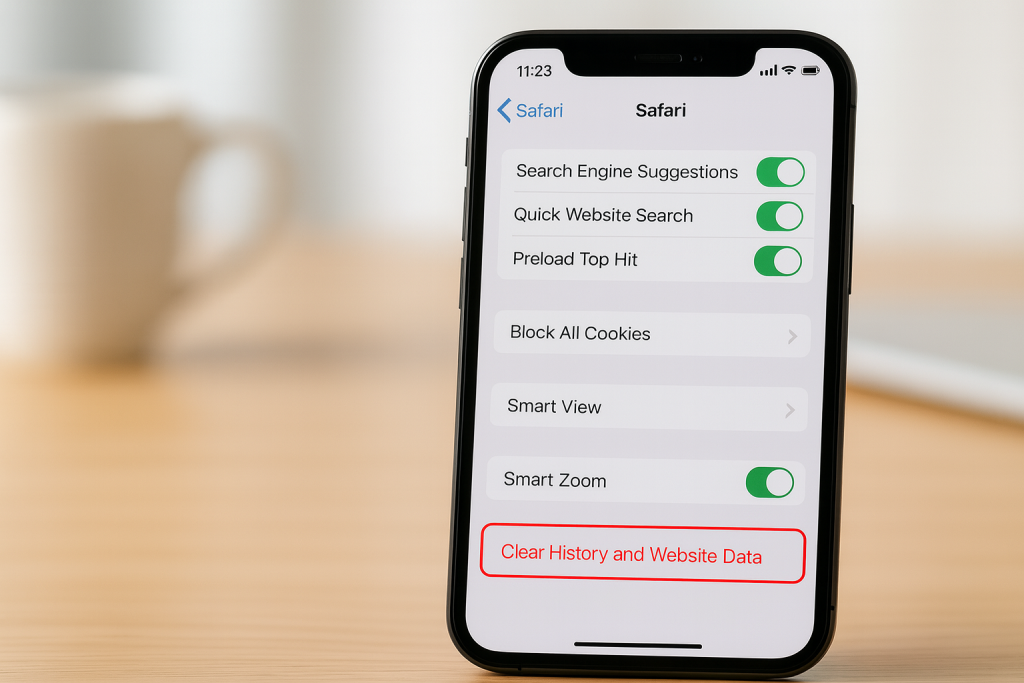
Step 4: Confirm Deletion
Choose “Clear History and Data” in the pop-up confirmation box. This step ensures you’re intentionally erasing your browsing activity. Once tapped, Safari will begin deleting your history, cookies, and cached website data.
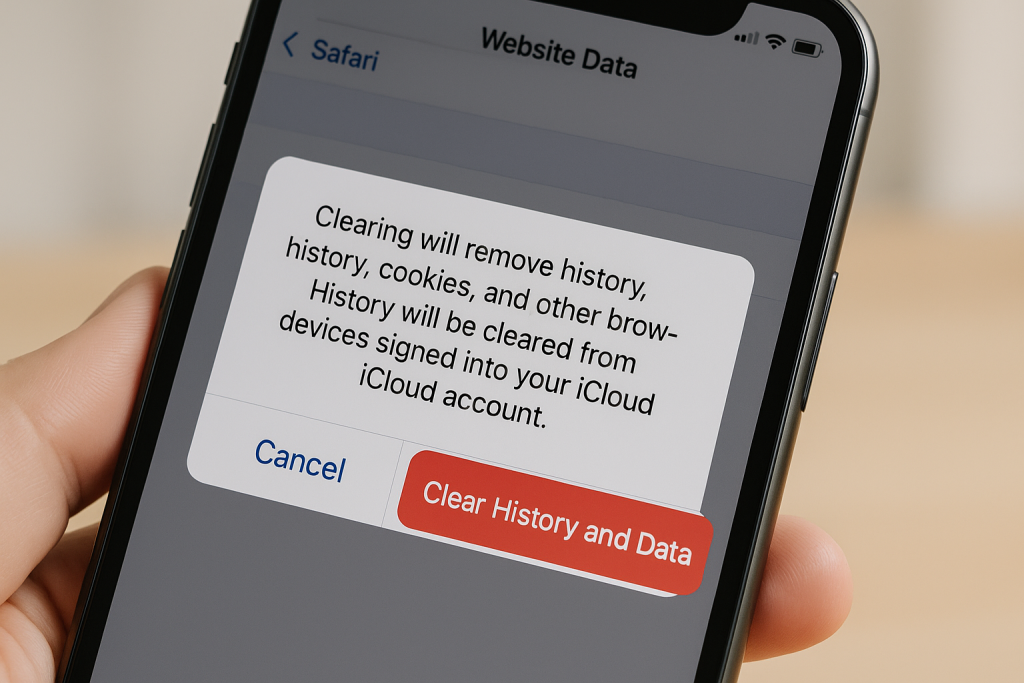
Step 5: Wait for the Process to Complete
The deletion usually takes just a few seconds. Afterward, the “Clear History and Website Data” button will appear grayed out, indicating your history has been successfully cleared.
Step 6: Optional – Manage Advanced Website Data
If you want to remove specific website data instead of everything, scroll further in Safari settings and tap “Advanced” > “Website Data”. Here, you can individually delete stored data for each site by swiping left and tapping “Delete”.
Step 7: Verify Browsing History Is Gone
To make sure your history was erased, open the Safari app, tap the book icon at the bottom, and select the clock tab (“History”). You should see an empty list or only recent new activity.
Customizing What Gets Deleted: Selective History and Data Removal
Deleting Specific Sites from Safari History
If you want to keep most of your browsing history but need to delete visits to certain websites, Safari on iPhone allows for selective deletion. In the Safari app:
- Tap the book icon (Bookmarks) at the bottom of the browser.
- Select the clock tab (“History”).
- Swipe left on any website you want to remove and tap “Delete”.
This approach gives you granular control over your browsing data, making it easy to protect privacy without losing all your search history.
Clearing Cookies and Cache Only
If you’re experiencing slow website loading or login issues but don’t want to erase your entire history, you can clear cookies and cache only. In Settings > Safari > Advanced > Website Data, tap “Remove All Website Data”. This keeps your browsing history intact but removes site-specific data that may cause issues.
What to Do If “Clear History and Website Data” is Grayed Out
Some users find that the “Clear History and Website Data” option in Safari settings is grayed out and unavailable. This is often due to screen time restrictions or device management settings:
- Screen Time Restrictions: Go to Settings > Screen Time > Content & Privacy Restrictions > Content Restrictions > Web Content and ensure restrictions are not blocking Safari changes.
- Device Management Profiles: In corporate or school iPhones, management profiles may limit your ability to clear history. Check Settings > General > VPN & Device Management for active profiles.
Adjusting these settings will usually re-enable the clear history function.
How Clearing Safari History Improves Performance and Privacy
Regularly clearing your Safari history offers several benefits beyond privacy. It can free up storage space on your device, help resolve loading errors and website crashes, and ensure the browser runs smoothly. According to Apple, deleting website data can lead to faster browsing and fewer glitches, especially on older iPhone models.
From a privacy standpoint, clearing history ensures that sensitive searches, financial transactions, and personal browsing activity cannot be accessed by others using your phone. This is particularly crucial if you share your device or are concerned about targeted advertising and tracking.
Pro Tips: Enhance iPhone Safari Privacy Beyond Just Clearing History
Browse with Private Mode
Safari offers a Private Browsing mode that prevents the browser from saving history, cookies, or autofill information. To use it, tap the Tabs icon (two overlapping squares), then select “Private” before opening a new tab. All browsing activity in this session will be erased once you close the tabs.
Disable Safari Suggestions and Autofill
You can further limit data collection by disabling Safari Suggestions and Autofill:
- In Settings > Safari, toggle off “Safari Suggestions” and “Search Engine Suggestions”.
- Under Autofill, turn off options for contact info, credit cards, and passwords unless you need them.
This minimizes your digital footprint and keeps your personal information safe.
Frequently Asked Questions About Safari History on iPhone
Does clearing Safari history delete bookmarks?
No, removing your browsing history and website data will not affect your bookmarks or saved reading lists. These remain untouched unless you delete them separately.
Will clearing Safari history on my iPhone delete history on my iPad or Mac?
If you use iCloud and have Safari sync enabled, clearing history on one device will delete it across all linked Apple devices. To disable this feature, go to Settings > [your name] > iCloud and toggle Safari off.
How often should I clear my Safari history?
For optimal privacy and performance, consider clearing your Safari history every few weeks, or more often if you frequently access sensitive sites. Regular maintenance also helps prevent slowdowns.
Conclusion: Take Charge of Your Safari Privacy Today
Keeping your iPhone Safari history clean is an essential habit for digital privacy, security, and device performance. By following the steps and tips outlined above, you can easily manage your browsing data, protect sensitive information, and enjoy a faster, safer online experience. Whether you’re interested in a full history wipe or just want to remove select sites, Safari offers flexible tools to put you in control.
Start implementing these best practices today, and make your iPhone browsing not only efficient, but also truly private.
