Why Enable Screen Recording on Your iPhone?
Screen recording is a powerful, built-in feature on the iPhone that lets you capture video footage of everything happening on your device’s screen. Whether you want to create tutorials, save memorable video calls, share gameplay, or troubleshoot issues, enabling screen recording on iPhone opens up a world of possibilities.
The best part? It’s incredibly easy to set up and use, even if you’re new to iOS. With its user-friendly controls, anyone can start recording their iPhone screen in just a few taps. Below, you’ll find a detailed guide to not only enable screen recording, but also to master its usage for the best possible results.
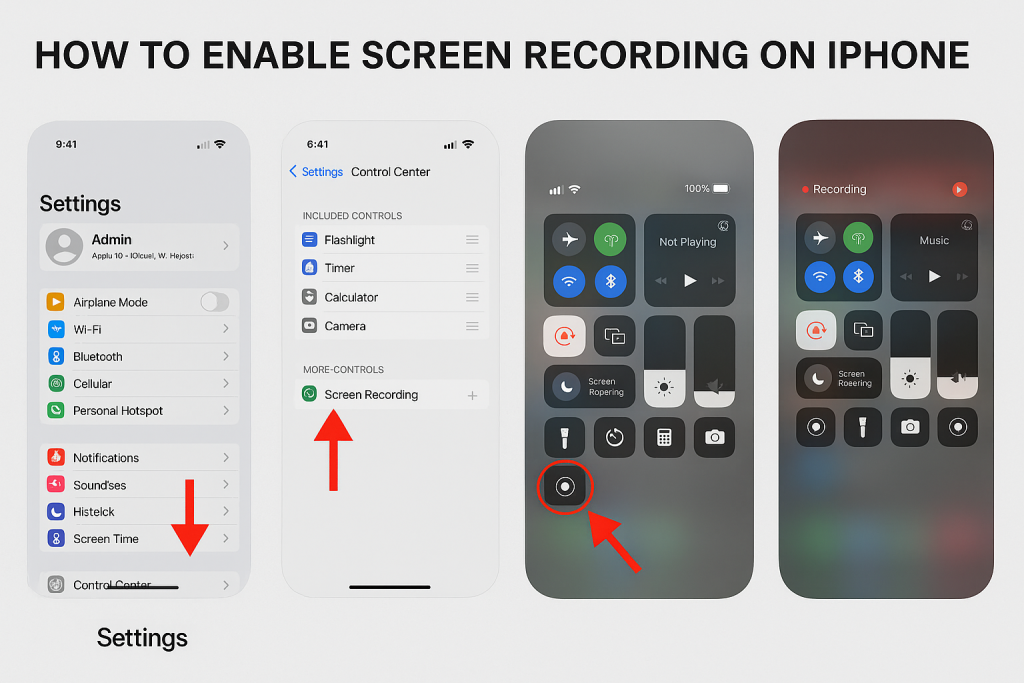
Step 1: Add Screen Recording to Control Center
Before you can use screen recording, you need to make sure the feature is accessible from your Control Center. The Control Center is the quickest way to start and stop your screen recordings.
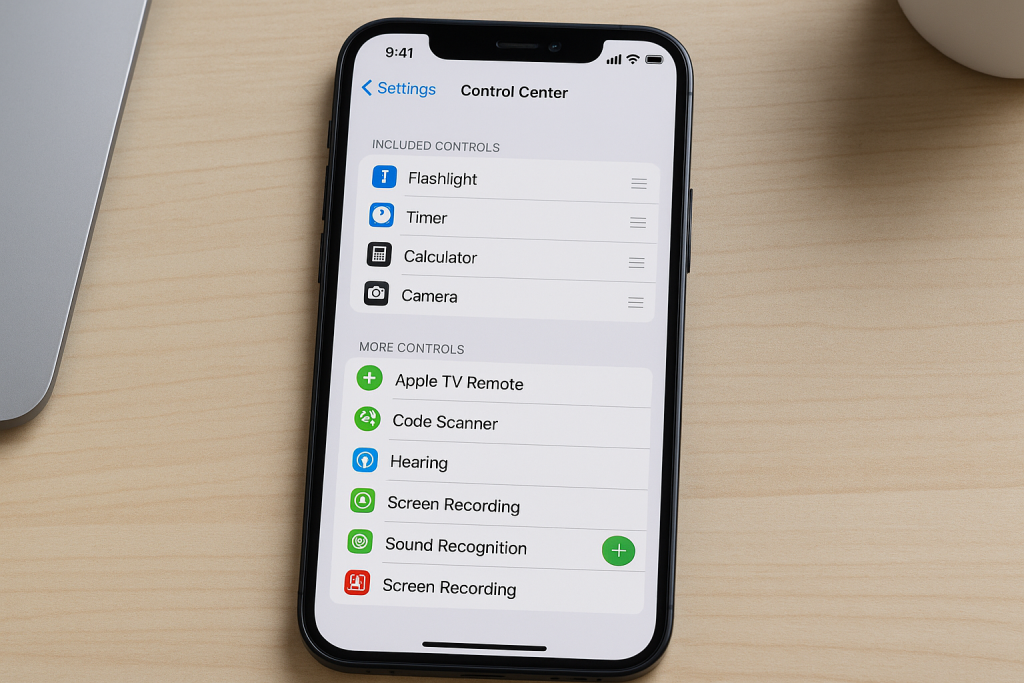
How to Access Control Center Settings
To get started, open the Settings app on your iPhone. Scroll down and tap on Control Center. Here, you can customize which quick-access features appear when you swipe down from the top-right corner of your screen (on iPhone X and later) or up from the bottom (on earlier models).
Adding Screen Recording to Control Center
- In Control Center settings, scroll to the More Controls section.
- Find Screen Recording in the list.
- Tap the green + icon next to Screen Recording to add it to your included controls.
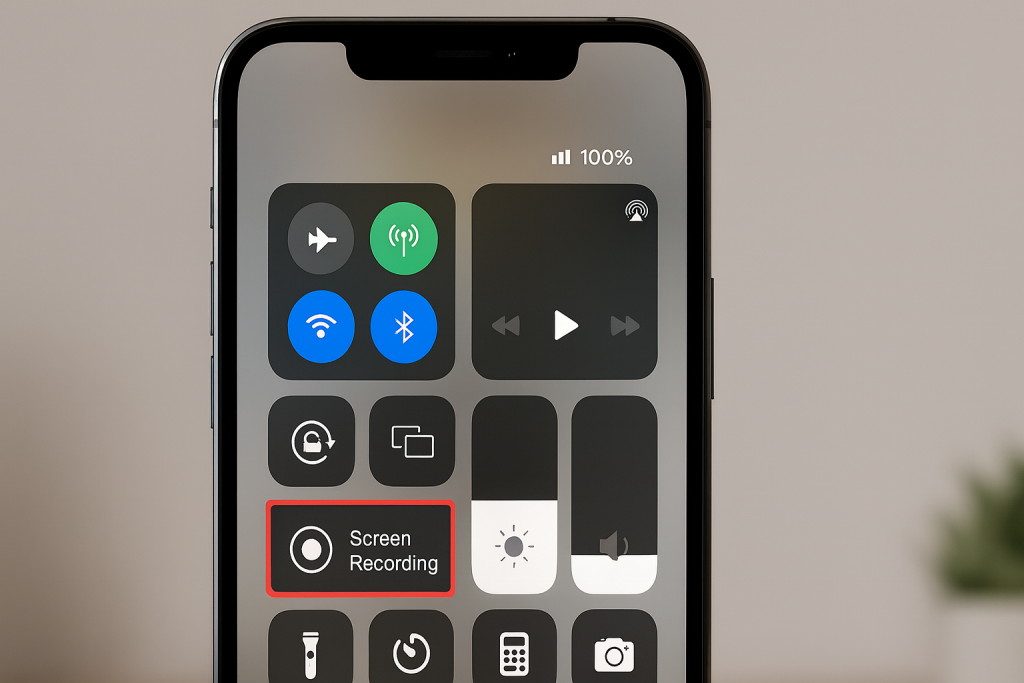
Once added, the Screen Recording icon (a solid dot inside a circle) will appear in your Control Center, making it accessible with a quick swipe.
Step 2: Start and Stop Screen Recording
With the feature enabled in Control Center, you’re ready to begin recording your iPhone screen. Below are the steps for starting, stopping, and customizing your recordings.
Starting a Screen Recording
- Open the Control Center by swiping down from the top-right corner (on Face ID iPhones) or up from the bottom (on Touch ID devices).
- Tap the Screen Recording button.
- A short countdown (usually 3 seconds) will begin, giving you time to prepare.
- After the countdown, everything on your screen will be recorded, including swipes and app interactions.
Stopping a Screen Recording
- When you’re finished, open the Control Center again and tap the Screen Recording button, or
- Tap the red recording status bar at the top of your screen and confirm you want to stop recording.
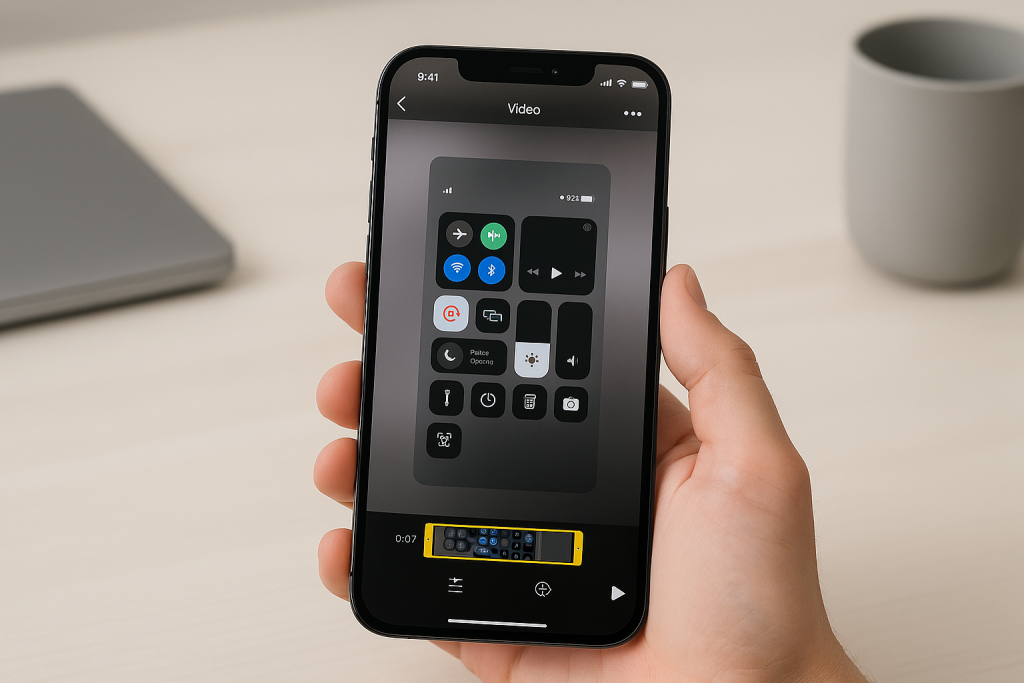
Your video will automatically be saved to your Photos app, where you can view, edit, and share it as needed.
Step 3: Record Screen with Audio
Sometimes, you may want to include audio in your screen recordings, such as voice narration or app sounds. The iPhone allows you to record both internal and external audio for a richer, more informative video.
Enabling Microphone Audio
- Open Control Center as before.
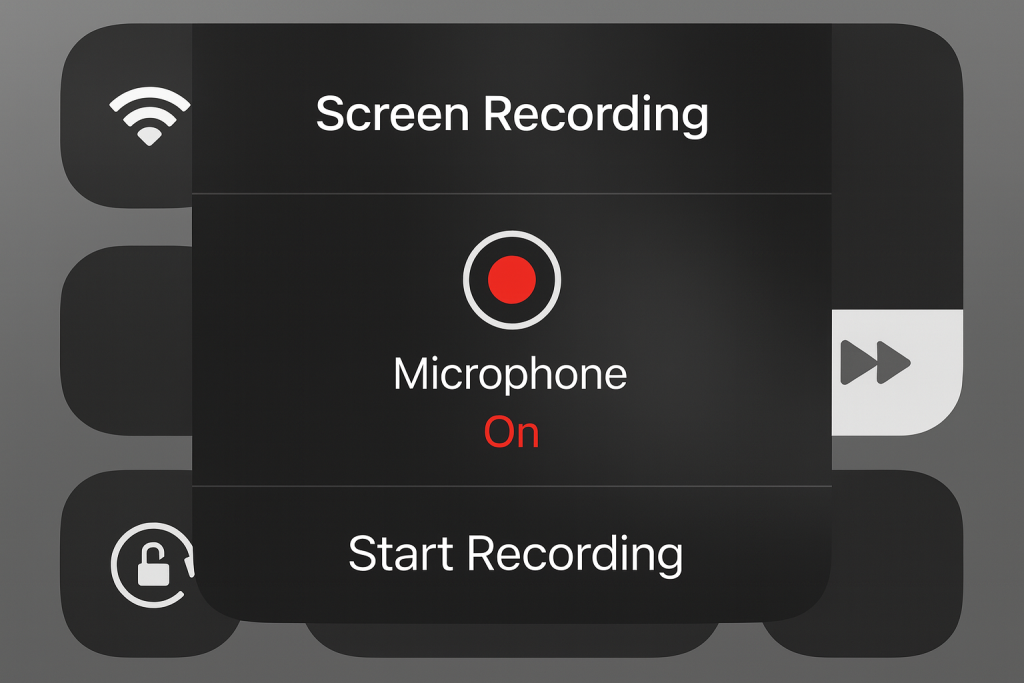
- Press and hold the Screen Recording button (do not just tap it).
- In the pop-up menu, tap the Microphone icon to turn audio recording on.
- Tap Start Recording to begin capturing both video and sound.
With the microphone enabled, you can add live commentary or record ambient sounds while recording your screen—perfect for tutorials, walkthroughs, and more.
Tips for High-Quality Screen Recordings
Getting the most out of your iPhone’s screen recording feature is about more than just pressing the record button. Here are some proven tips to ensure your videos are clear, polished, and effective:
- Turn on Do Not Disturb: Prevent notifications and calls from interrupting your recording by enabling Do Not Disturb mode.
- Clean Up Your Screen: Close unnecessary apps and tidy up your Home Screen for a distraction-free recording.
- Practice Your Workflow: Rehearse the actions you plan to record to avoid mistakes and speed up your process.
- Edit After Recording: Use the built-in Photos app or third-party editors to trim unwanted sections and enhance your video.
- Check Storage Space: Make sure you have enough free space for the recording, as video files can become large, especially for long sessions.
Frequently Asked Questions About iPhone Screen Recording
To help you get the most out of this feature, here are answers to some of the most common questions about screen recording on iPhone:
Which iPhones Support Screen Recording?
Screen recording is supported on all devices running iOS 11 and later, which includes iPhone 5s and newer. However, for the smoothest performance and the latest features, it’s recommended to use devices running the latest iOS version.
Can I Record App or System Audio Only?
By default, enabling the microphone captures both external sounds and system audio. However, some apps may restrict internal audio recording for privacy reasons. If you only need system sounds (and not your microphone), start recording without enabling the microphone.
Why Is My Screen Recording Not Working?
If you can’t find the screen recording feature or it’s not working correctly, try the following troubleshooting steps:
- Check that your device is updated to the latest version of iOS.
- Ensure Screen Recording is added to Control Center.
- Restart your iPhone to resolve minor glitches.
- Check if there are any restrictions set in Screen Time (Settings > Screen Time > Content & Privacy Restrictions > Allowed Apps).
Advanced Tips for Power Users
For those who want to go beyond basic recordings, there are several advanced strategies to enhance your videos:
Use Third-Party Apps for Enhanced Editing
While the built-in Photos app offers trimming features, third-party apps like iMovie or LumaFusion provide robust editing options. You can add transitions, overlays, text, and music—perfect for creating professional-grade tutorials or presentations.
Sharing and Exporting Your Recordings
After recording, your video is saved in Photos. From there, you can:
- Share directly: Tap the share icon to upload to social media, send via email, or share with AirDrop.
- Upload to the cloud: Save your recordings to iCloud, Google Drive, or Dropbox for backup and easy access across devices.
- Edit before sharing: Trim, crop, and apply filters to make your video more engaging before showing it to others.
Common Uses for iPhone Screen Recordings
Screen recording isn’t just a novelty feature—it has dozens of practical applications for both personal and professional use. Here are some examples:
- Create app tutorials: Guide friends or clients through complex app features.
- Record gameplay: Capture and share your best gaming moments.
- Save video calls: Keep a record of important FaceTime or Zoom conversations (be sure to get permission from all participants).
- Report bugs: Show developers exactly what issues you are experiencing with an app or system feature.
- Document digital processes: Archive walkthroughs for training or future reference.
Conclusion: Mastering iPhone Screen Recording
Once you know how to enable and use screen recording on your iPhone, you unlock an incredibly useful tool for communication, education, and entertainment. From quick how-to videos to detailed tutorials, the possibilities are endless. With the steps and tips provided above, you can create high-quality screen recordings with ease and confidence. Don’t forget to explore editing options and always respect privacy when capturing or sharing video content.
If you found this guide useful, consider bookmarking it or sharing it with others who want to master iPhone screen recording. Happy recording!
