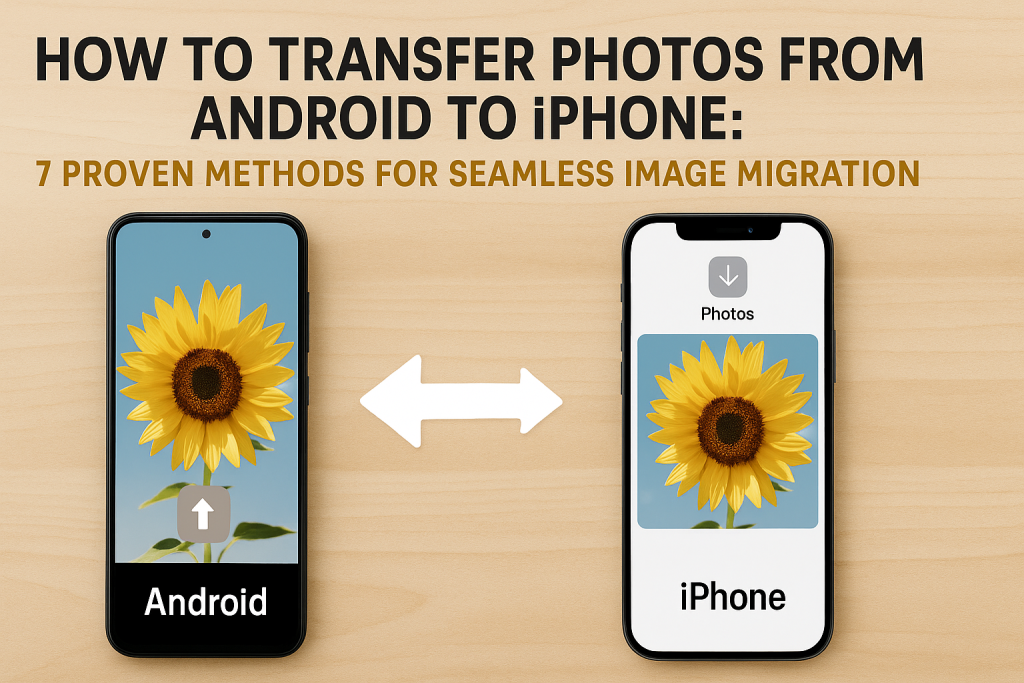
Introduction: Why Photo Transfer Matters When Switching Devices
Switching from an Android phone to an iPhone is an exciting upgrade, but many users find themselves asking a crucial question: How can I safely transfer my photos and images from Android to iPhone? Your memories, travel snapshots, and family pictures are too valuable to lose. Fortunately, technology offers several efficient and reliable ways to ensure your entire photo library arrives intact on your new iOS device.
This comprehensive guide covers the 7 best methods to transfer photos from Android to iPhone, including built-in tools, popular apps, and cloud services. Whether you’re a tech novice or a seasoned smartphone user, you’ll find step-by-step instructions and practical tips for each solution.
1. Move to iOS App: Apple’s Official Photo Transfer Solution
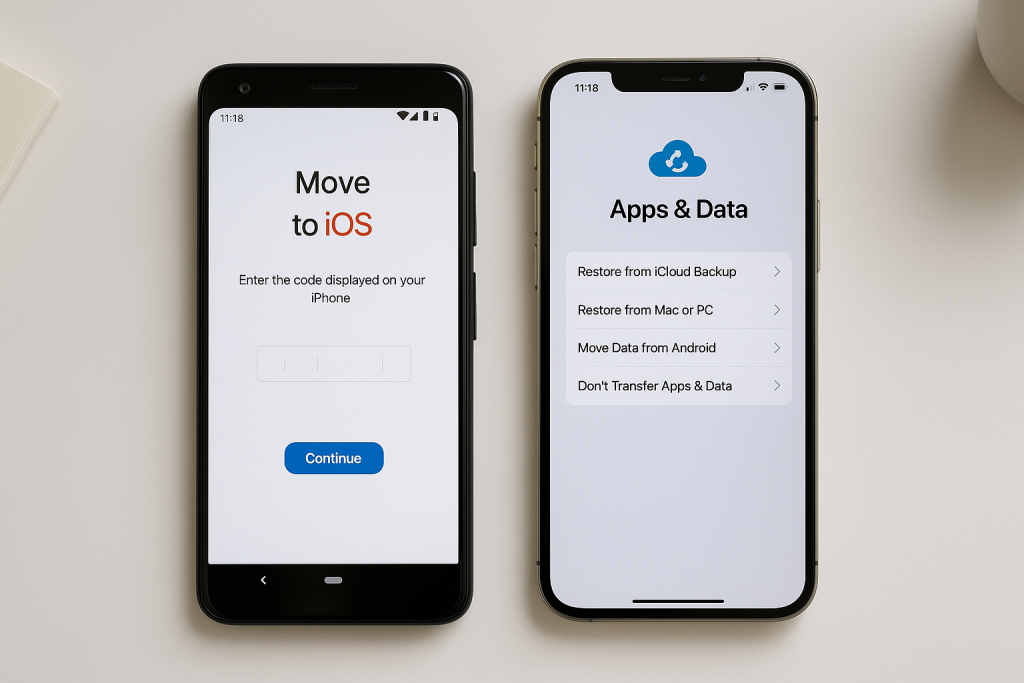
Apple has developed the Move to iOS app specifically for users migrating from Android to iPhone. This free app allows you to wirelessly transfer photos, contacts, messages, and more during the initial iPhone setup.
How to Use Move to iOS for Photo Transfer
- Download and install the Move to iOS app from the Google Play Store on your Android device.
- Begin setting up your new iPhone. When you reach the “Apps & Data” screen, select Move Data from Android.
- Open the Move to iOS app on Android and tap Continue. Agree to the terms and conditions.
- On your iPhone, tap Continue and wait for a code to appear.
- Enter the code on your Android device. The two devices will connect over Wi-Fi.
- Select Photos (and any other data you wish to move) and tap Continue.
- The transfer process will begin. Photos will appear in the Photos app on your iPhone when complete.
Tip: For best results, keep both devices plugged into power and connected to Wi-Fi during the process.
Benefits and Limitations
Benefits: Move to iOS is secure, doesn’t require a computer, and transfers all photos in one go.
Limitations: This method only works during initial iPhone setup. If you’ve already set up your iPhone, you’ll need to reset it or use another method below.
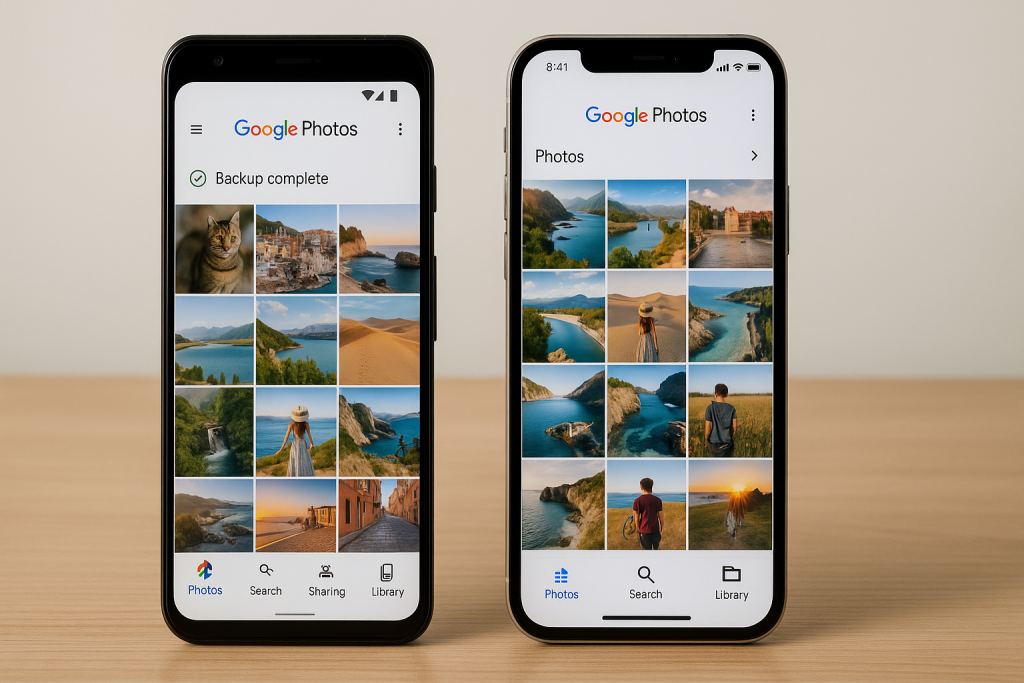
2. Google Photos: Cloud-Based Transfer for Convenience and Backup
Google Photos is one of the most popular cloud photo storage services, especially for Android users. It provides an easy way to transfer your entire photo library to a new iPhone, plus you’ll have a backup in the cloud.
Step-by-Step Guide Using Google Photos
- On your Android device, open Google Photos and sign in with your Google account.
- Enable Backup & sync in the app’s settings to upload all your photos to the cloud.
- Wait until all photos are fully backed up (Wi-Fi recommended for speed and data savings).
- On your iPhone, download Google Photos from the App Store and sign in with the same Google account.
- Your photos will appear in the app. To save them to your iPhone’s local storage, select photos, tap the share icon, and choose Save to device.
Pro Tip: Google Photos offers powerful search and organizational tools, making it easy to find and manage your pictures after transfer.
Advantages and Considerations
Advantages: No need to reset your iPhone, works on existing devices, and keeps photos safely backed up.
Considerations: Free Google accounts include 15GB of storage shared across all Google services. If your photo library is large, you may need to upgrade to Google One for additional storage.
3. File Transfer Apps: Quick Wireless Solutions
Several third-party file transfer apps specialize in moving photos between Android and iPhone. Options such as SHAREit, Send Anywhere, and Xender enable direct wireless transfer without cables or cloud storage.
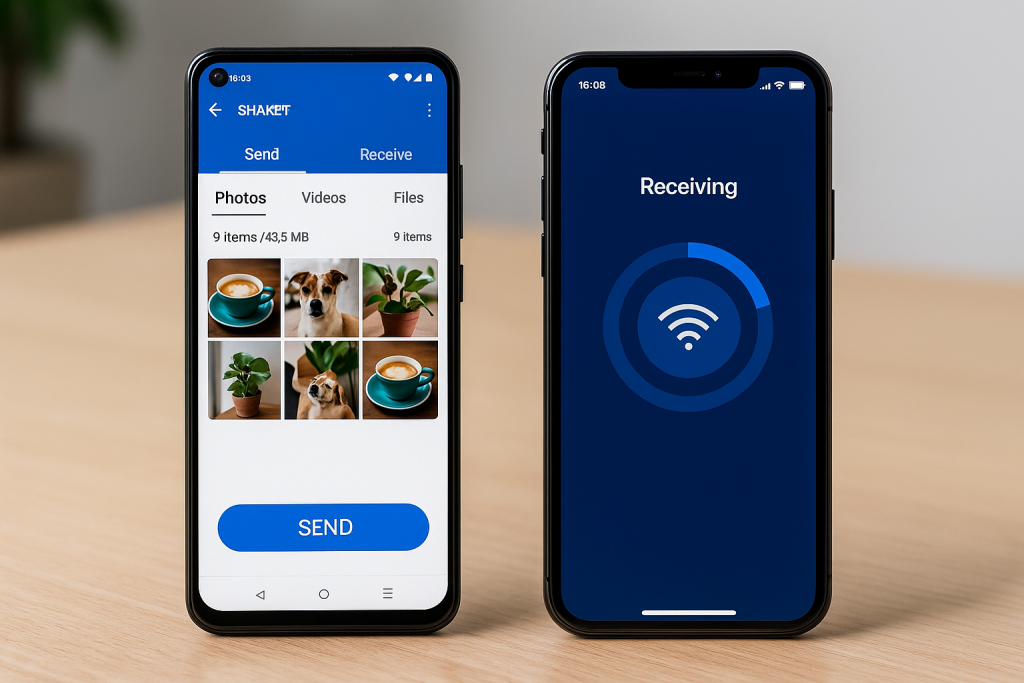
How to Transfer Photos with SHAREit (or Similar Apps)
- Install the same transfer app (e.g., SHAREit) on both your Android device and iPhone.
- Open the app on both devices and connect them using the app’s guided process (often requires both devices to be on the same Wi-Fi network or to scan a QR code).
- On your Android phone, select the photos you want to transfer and tap Send.
- Accept the incoming file transfer on your iPhone.
- Transferred photos will be stored in the app’s folder and can be saved to your iPhone’s Photos app.
Tip: These apps are ideal for large batches of photos and do not require a computer or internet connection.
Pros and Cons
- Pros: Fast, works offline, and supports other file types too.
- Cons: Requires installation of a third-party app and sometimes manual sorting of transferred photos.
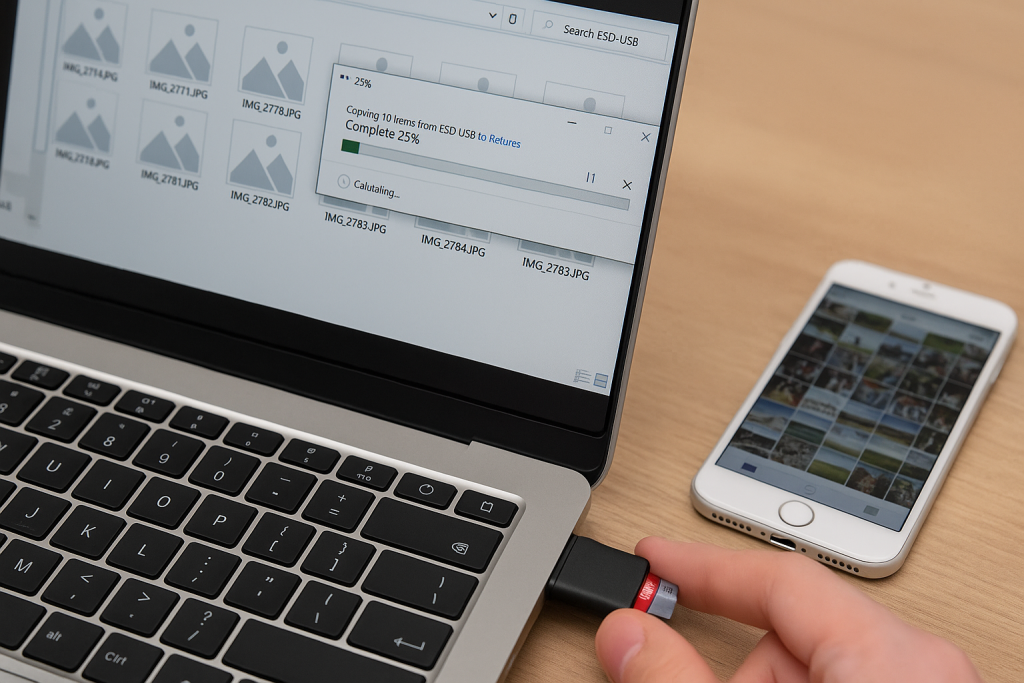
4. Manual Transfer via Computer: For Complete Control
If you prefer a hands-on approach, transferring images from Android to iPhone using a computer gives you maximum control and full backup capabilities. This method uses a PC or Mac as an intermediary for the move.
Step-by-Step Computer Transfer
- Connect your Android phone to your computer using a USB cable.
- Open the device’s storage folder and locate the DCIM (photos) and Pictures folders.
- Copy desired images to a folder on your PC or Mac.
- Disconnect your Android device and connect your iPhone to the computer.
- Use iTunes (on Windows or older Macs) or the Photos app (on Mac) to sync these images to your iPhone.
- Alternatively, email the photos to yourself and download them directly on your iPhone.
Tip: This method is excellent for users who want to organize, edit, or back up their photos before transferring.
Advantages and What to Watch For
Advantages: Complete flexibility in selecting and organizing photos.
Watch For: The process can be time-consuming with very large collections and may require software updates or drivers.
5. Using Bluetooth: Limited but Possible
While Bluetooth was once a popular tool for photo sharing, direct Bluetooth transfers between Android and iPhone are typically unsupported due to system limitations. However, some apps simulate Bluetooth-like transfers using Wi-Fi Direct.
Alternative Wireless Transfer Tips
- Try apps like Feem or Zapya that create a shared wireless connection for file transfers.
- Always check that both devices are connected to the same Wi-Fi network.
- Remember that direct Bluetooth transfer may be limited to contacts or audio files, not full-res photos.
Expert Insight: For the fastest results, stick with Wi-Fi-based transfer apps instead of Bluetooth.
6. Email or Messaging Apps: Simple for Small Transfers
If you only need to move a handful of photos, sending them to yourself via email or a messaging app (like WhatsApp or Telegram) is a quick and easy method. However, this approach is less practical for transferring a large photo library.
How to Email Photos from Android to iPhone
- Select the photos on your Android device.
- Tap Share, then choose your email app.
- Send the photos to your own email address.
- Open the email on your iPhone and download the attached images.
Tip: Some messaging apps may compress photo quality. For important images, verify resolution before deleting original files.
7. SD Card Transfer: For Devices with Expandable Storage
If your Android phone supports microSD cards, you can move photos using removable storage. This is especially useful if you want a physical backup or have large files.
SD Card Transfer Steps
- Copy photos from your Android phone to the microSD card.
- Remove the SD card and insert it into a card reader connected to your computer.
- Copy the images to your PC or Mac.
- Transfer them to your iPhone using iTunes or the Photos app as described earlier.
Tip: Always safely eject the SD card to prevent data corruption.
Pro Tips for a Smooth Photo Transfer
- Back up your photos on both devices before starting any transfer process.
- Ensure both devices are fully charged or connected to power sources.
- Use a strong, stable Wi-Fi connection to avoid interruptions, especially for large photo libraries.
- After transfer, check your iPhone’s Photos app to confirm all images appear as expected.
- Consider periodic transfers if you use both devices for a while.
Frequently Asked Questions About Transferring Photos from Android to iPhone
Will photo quality stay the same when transferring between Android and iPhone?
Most transfer methods preserve the original photo quality, but emailing or using some messaging apps may compress images. Cloud or direct app transfers are best for retaining full resolution.
Can I transfer other types of files too?
Yes, most third-party transfer apps allow documents, contacts, videos, and music to be moved as well. Apple’s Move to iOS app also supports messages, bookmarks, and calendars.
What should I do if some images are missing after transfer?
Double-check your backup and original folders. In some cases, restarting the transfer or using a different method will recover missing images. Cloud solutions like Google Photos can help verify if all items are synced.
Conclusion: Choose the Best Photo Transfer Method for Your Needs
Moving your precious photos from Android to iPhone doesn’t need to be stressful. With these 7 proven methods, you can confidently switch devices knowing your memories are safe. Whether you prefer Apple’s official Move to iOS solution, the convenience of Google Photos, powerful transfer apps, or hands-on computer management, there’s a method tailored for every situation.
Start your transfer today and enjoy your photos on your new iPhone, hassle-free!