If you love flawless makeup application, a beauty blender is likely your go-to tool. However, this miracle sponge can quickly turn into a breeding ground for bacteria and makeup residue if not cleaned regularly. In this comprehensive guide, you’ll learn how to wash your beauty blender properly to keep it clean, soft, and ready for a perfect blend every time.
Why It’s Important to Clean Your Beauty Blender
Cleaning your beauty blender isn’t just about appearance—it’s about hygiene and skin health. Residual foundation, concealer, and powder can clog pores, causing breakouts and irritation. In addition, a damp, dirty sponge creates an environment where bacteria and mold can thrive.
- Prevents skin issues: Reduces breakouts and sensitivity caused by bacteria and product build-up.
- Extends sponge life: Regular cleaning maintains the integrity and longevity of your beauty blender.
- Ensures flawless application: A clean sponge delivers a smoother, streak-free makeup finish.
How Often Should You Wash Your Beauty Blender?
Ideally, you should wash your beauty blender after every use. For those with sensitive or acne-prone skin, daily cleaning is especially important. At a minimum, try to clean your sponge at least once a week. The more often you clean it, the easier the process becomes as product doesn’t have time to build up and dry out.
What You Will Need to Clean Your Beauty Blender
Gather these supplies before you start:
- Mild soap or cleanser (liquid or bar)
- Warm water
- Towel or paper towels for drying
- Optional: Microwave-safe bowl, olive oil, or specialized beauty blender cleanser
Step-by-Step Guide: How to Wash Your Beauty Blender
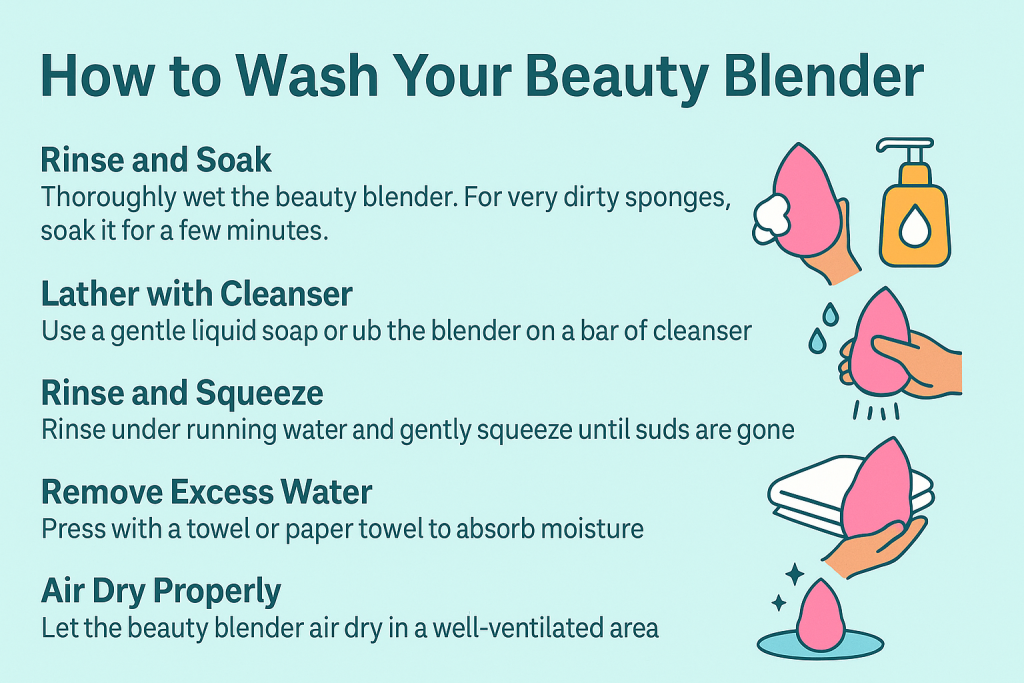
1. Rinse and Soak
Begin by thoroughly wetting your beauty blender under warm running water. Squeeze it several times to ensure it is completely saturated. If the sponge is very dirty, let it soak in warm water for a few minutes to loosen stubborn makeup.
2. Lather with Cleanser
Choose a gentle cleanser. You can use a specialized beauty blender soap, an unscented baby shampoo, or a mild liquid soap. Avoid harsh cleansers or those with strong fragrances, as they can degrade the sponge material or irritate your skin.
- Liquid Cleanser: Apply a few drops onto the sponge, and work it in with your fingers.
- Bar Soap: Rub the wet beauty blender directly onto the bar, creating a lather.
Massage gently to avoid tearing the sponge. Focus on heavily stained areas and make sure the cleanser penetrates deep into the sponge.
3. Rinse and Squeeze
Rinse the beauty blender under warm running water, squeezing it repeatedly. You’ll see makeup residue and suds rinsing out. Continue until the water runs clear and no soap remains. This may take several rinses, especially if the sponge is heavily soiled.
- Never wring or twist the sponge aggressively, as this can cause tearing.
- Repeat the cleansing process if necessary for stubborn stains.
4. Remove Excess Water
After rinsing, gently press the beauty blender with a clean towel or paper towel to remove excess moisture. Avoid leaving the sponge soaking wet, as it can encourage mold growth.
5. Air Dry Properly
Let your beauty blender air dry in a well-ventilated area. Place it on a clean towel or a dedicated drying stand. Avoid storing it in closed containers or makeup bags while still damp—this can trap moisture and promote bacteria.
- Never use heat sources like hair dryers, as this can damage the sponge.
- Drying in direct sunlight is safe and can even help kill bacteria.
Alternative Cleaning Methods
Microwave Cleaning Method
For a deep clean and to sterilize your beauty blender, try the microwave method:
- Fill a microwave-safe cup with water and a squirt of liquid soap.
- Fully submerge your sponge in the cup.
- Microwave on high for about 1 minute.
- Let the cup cool before removing the sponge (it will be hot!).
- Rinse thoroughly to remove any soapy residue.
This method helps disinfect and loosen stubborn stains, but use it with caution as microwaving can damage sponges not designed for heat. Make sure your beauty blender is microwave-safe before trying this technique.
Olive Oil & Soap Method for Stubborn Stains
If you notice lingering stains, mix a small amount of olive oil with your cleanser. The oil helps dissolve tough makeup like foundation and concealer. Massage into the stained area, then wash as usual with soap and water.
How to Maintain Your Beauty Blender
Beyond regular washing, follow these tips to keep your beauty blender in top condition:
- Replace every 3-6 months: Even with regular cleaning, sponges should be replaced every few months to prevent bacteria buildup and ensure optimal performance.
- Store properly: Always let your beauty blender dry completely before storing. Use a breathable pouch or ventilated holder.
- Avoid harsh chemicals: Stick to gentle, non-irritating cleansers.
- Watch for damage: If your sponge starts to crumble, develop holes, or lose elasticity, it’s time for a new one.
Frequently Asked Questions
Can You Wash a Beauty Blender in the Washing Machine?
It’s not recommended to wash your beauty blender in a washing machine. The agitation and heat can damage the delicate foam and cause it to break down prematurely. Always wash by hand or use the microwave method.
Can I Use Dish Soap or Regular Soap?
Mild dish soap can be used in a pinch, but avoid formulas with harsh chemicals or strong fragrances. Unscented baby shampoo or specialized sponge cleansers are safer choices for the skin and the sponge material.
How Do I Know If My Beauty Blender Is Clean?
Your sponge should be free of visible makeup stains, and the rinse water should run clear. There should be no lingering odors. If stubborn spots remain after several washes, it might be time to replace your beauty blender.
Conclusion: Keep Your Makeup Sponge Spotless
Knowing how to wash your beauty blender is essential for healthy, beautiful skin and a flawless makeup routine. Regular, thorough cleaning prevents bacteria, prolongs the life of your sponge, and ensures stunning makeup application every time. Invest a few minutes after each use, and your beauty blender—and your skin—will thank you!