A damp makeup sponge can make foundation look smooth, skin-like, and seamless, but it can also collect makeup residue, facial oils, dead skin, and bacteria fast. Learning how to wash a beauty blender properly helps your sponge perform better, last longer, and stay safer for daily use. Whether you use the original Beautyblender, Real Techniques Miracle Complexion Sponge, e.l.f. Camo Sponge, or another latex-free makeup sponge, the cleaning method is similar: use warm water, gentle cleanser, steady squeezing, and enough drying time.

Introductory illustration
The best routine is simple. Rinse after each use, deep clean at least once a week, and replace the sponge when texture, smell, or stains no longer improve. This guide covers the most effective ways to clean a makeup sponge, remove stubborn foundation stains, dry it correctly, and avoid common mistakes that shorten its life.
Why You Should Clean Your Beauty Blender Regularly
A beauty blender works because its soft, porous texture absorbs water and bounces product across the skin. That same porous structure also traps foundation, concealer, sunscreen, primer, powder, and skin oils. If the sponge sits damp in a makeup bag or bathroom drawer, buildup can become harder to remove and may create an environment where microbes thrive.
Clean sponges also apply makeup better. A sponge filled with old product can feel stiff, spread foundation unevenly, and leave patchy areas around the nose, chin, and under eyes. Freshly washed sponges regain their bounce, absorb less product, and blend cream formulas more evenly.
Regular cleaning matters most if you have acne-prone, sensitive, or reactive skin. While washing a sponge does not make it sterile, it can reduce visible residue and help keep old makeup from being pressed back onto your face.
How Often Should You Wash a Makeup Sponge?
For everyday makeup users, rinse your sponge after every use and deep clean it once or twice a week. If you use heavy foundation, long-wear concealer, cream contour, or SPF-heavy base products, wash it more often. These formulas cling to sponge material and can leave oily residue if not cleaned thoroughly.
Professional makeup artists should clean sponges after every client and use disposable or fully sanitized tools where hygiene standards require it. For personal use at home, consistency is more important than perfection. A quick wash right after makeup application is easier than trying to remove dried foundation days later.
- After each use: quick rinse with warm water and gentle soap.
- Weekly: deep clean with solid cleanser, liquid brush cleanser, or mild soap.
- Monthly check: inspect for tears, odor, stubborn stains, or texture changes.
- Every 3 months: replace if used frequently, especially daily.
What You Need to Wash a Beauty Blender
You do not need expensive tools to clean a beauty blender well. The key is using a cleanser that breaks down makeup without damaging the sponge. Many U.S. beauty lovers use solid sponge cleansers because they are easy to rub directly onto stained areas. Liquid brush cleansers also work, especially for quick cleaning at the sink.
Best Cleansers for Makeup Sponges
A good beauty blender cleanser should lift oil-based makeup, rinse clean, and leave no heavy fragrance or film. Choose one of these options:
- Solid sponge cleanser: effective for foundation stains and travel-friendly.
- Liquid brush or sponge cleanser: easy for daily cleaning and fast rinsing.
- Gentle facial cleanser: useful if it removes makeup and has no exfoliating beads.
- Mild unscented soap: affordable and easy to find at drugstores.
- Baby shampoo: gentle option, though less powerful on long-wear foundation.
Avoid harsh dish soap for frequent washing if it leaves the sponge dry, stiff, or strongly scented. Occasional use may remove heavy buildup, but gentle cleansers are better for regular care.
Tools That Help But Are Not Required
A textured silicone cleansing mat, small bowl, or clean towel can make the process easier. However, your hands are enough. If using a cleansing mat, press gently. Scrubbing too aggressively can tear the sponge surface.
Step-by-Step: How to Wash a Beauty Blender
This method works for most makeup sponges and is safe for routine cleaning. Use warm water, not hot water. Hot water can affect sponge texture over time, while cold water is less effective at breaking down makeup oils.
- Wet the sponge fully. Hold it under warm running water until it expands and feels completely saturated.
- Add cleanser. Apply liquid cleanser directly to stained areas or rub the sponge across a solid cleanser.
- Squeeze, do not twist. Gently squeeze the sponge in your palm to push cleanser through the center. Avoid wringing, twisting, or pulling.
- Massage stained areas. Use fingertips to work cleanser into foundation marks, especially on the pointed tip and rounded base.
- Rinse thoroughly. Keep squeezing under warm water until water runs clear and no suds remain.
- Repeat if needed. Long-wear foundation may need a second cleanse.
- Remove excess water. Press sponge in a clean towel to absorb moisture.
- Air dry fully. Place it in an open, ventilated area until completely dry.
The most important part is rinsing. Leftover soap can irritate skin and make makeup apply unevenly. If the sponge still feels slippery or foamy, keep rinsing.
How to Deep Clean a Beauty Blender With a Soak

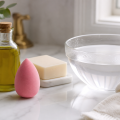
Detailed illustration
A weekly soak helps remove stubborn makeup lodged inside the sponge. This is useful when your sponge still looks stained after normal washing or feels heavy with product.
Fill a clean bowl with warm water and add a few drops of gentle liquid cleanser. Place the sponge in the water and squeeze several times to pull the soapy water through. Let it sit for 10 to 15 minutes. After soaking, massage stained areas, rinse under warm water, and squeeze until water runs clear.
Do not leave your sponge soaking for hours. Long soaking may weaken the material or cause unnecessary wear. Short soaking plus gentle squeezing is enough for most buildup.
How to Remove Foundation Stains From a Makeup Sponge
Some foundation stains are normal, especially from full-coverage, matte, waterproof, or oil-based formulas. Staining does not always mean the sponge is dirty if it has been washed thoroughly and rinses clean. Still, you can reduce discoloration with targeted cleaning.
Use Solid Cleanser on Stained Spots
Wet the sponge, rub stained areas directly over a solid cleanser, then squeeze foam through the sponge. Focus on the tip where concealer and foundation often concentrate. Repeat once if needed.
Try an Oil-First Method for Long-Wear Makeup
For stubborn makeup, apply a tiny amount of cleansing oil or oil-based makeup remover to the stained area before washing with soap. Massage lightly, then follow with cleanser and rinse very well. This can break down long-wear foundation, but do not leave oil in the sponge. Any leftover oil may affect makeup application.
Skip Bleach and Harsh Chemicals
Do not use bleach, bathroom cleaner, alcohol-heavy products, or laundry detergent on a beauty blender. These can damage the sponge and leave residues that should not touch your face.
Can You Microwave a Beauty Blender to Clean It?
Microwaving a sponge became popular online, but it is not the best everyday cleaning method. Some people place a sponge in a cup of soapy water and microwave it briefly to loosen buildup. However, this can be risky if the sponge is not fully submerged, if the water overheats, or if the sponge material reacts poorly.
Microwaving can also create a false sense of cleanliness. Heat may reduce some microbes, but it does not replace proper washing because makeup residue, oils, and soap film still need to be rinsed out. For safest regular care, wash by hand with warm water and cleanser.
If you choose to microwave a makeup sponge, it must be fully submerged in water, watched carefully, and allowed to cool before touching. Never microwave a dry or barely damp sponge.
How to Dry Your Beauty Blender Correctly
Drying matters as much as washing. A clean sponge stored while damp can develop odor or mildew-like smell. After rinsing, press it gently in a clean towel to remove extra water. Then place it somewhere with airflow, such as on a clean counter, sponge stand, or ventilated holder.
Avoid sealing a damp beauty blender in a plastic bag, makeup pouch, drawer, or airtight container. The original Beautyblender canister can be useful only if it allows airflow and the sponge has room to dry. If the sponge touches dirty surfaces, place it on a clean towel or drying rack.
Do not use a hair dryer on high heat. Heat can change sponge texture and cause cracking. Air drying is slower but safer.
Common Mistakes That Ruin Makeup Sponges
Many sponge problems come from cleaning too roughly or drying poorly. A beauty blender is durable enough for regular use, but it is still soft foam. Treat it gently to extend its life.
- Twisting or wringing: causes tears and weak spots.
- Using hot water: may affect texture over time.
- Skipping full rinse: leaves soap residue that can irritate skin.
- Storing damp: can create unpleasant odor.
- Scrubbing with nails: can puncture sponge surface.
- Using harsh cleaners: may break down foam and leave unsafe residue.
When Should You Replace Your Beauty Blender?

Related context illustration
Even with perfect care, makeup sponges do not last forever. Replace your beauty blender every three months if you use it daily. Replace it sooner if it develops tears, black spots, sour smell, rough texture, or stains that no longer improve after washing.
A sponge that smells bad after cleaning should be thrown away. Odor can mean moisture or product buildup is trapped inside. Also replace any sponge that causes unusual irritation or breakouts after use, especially if your skincare and makeup routine have not changed.
Quick Cleaning Routine for Busy Mornings
If you do not have time for a full deep clean, use a fast post-application wash. Run the sponge under warm water, add one pump of liquid cleanser, squeeze for 30 to 60 seconds, rinse until clear, then press in a towel. Leave it out to dry while you go about your day.
This quick habit prevents foundation from drying inside the sponge. It also makes weekly deep cleaning much easier. The best time to wash a beauty blender is right after using it, before makeup sets into the foam.
Best Storage Tips for a Clean Makeup Sponge
Store your sponge in a dry, breathable place. A ventilated holder, open tray, or clean vanity area works better than a zipped makeup bag. For travel, let the sponge dry fully before packing it. If you must travel with a damp sponge, use a breathable case and unpack it as soon as possible.
Keep your sponge separate from dirty brushes, pencil sharpeners, open powders, and loose makeup. Clean storage reduces how often dust and old product transfer back onto the sponge.
Frequently Asked Questions
Can I use hand soap to clean a beauty blender?
Yes, mild hand soap can work if it rinses clean and does not leave strong fragrance. Unscented or gentle soap is better for sensitive skin.
Can I wash a beauty blender with face wash?
Yes, if the face wash is gentle and effective at removing makeup. Avoid exfoliating cleansers with gritty particles because they can damage sponge texture.
Why does my sponge still look stained after washing?
Pigment stains can remain even when the sponge is clean. If water runs clear, there is no smell, and the sponge feels fresh, slight staining is usually cosmetic.
Should I wet my sponge before every makeup application?
Yes. Most makeup sponges are designed to be used damp. Wet the sponge, squeeze out excess water, then press it in a towel before applying foundation or concealer.
How do I know if my beauty blender has mold?
Dark spots, musty odor, or discoloration that appears inside tears may be warning signs. Do not try to rescue it with stronger chemicals. Replace it.
Conclusion: Clean Sponge, Better Makeup
Knowing how to wash a beauty blender keeps your makeup routine cleaner, smoother, and more reliable. Use warm water, gentle cleanser, soft squeezing, and complete air drying. Rinse after each use, deep clean weekly, and replace the sponge when it smells, tears, or stops feeling fresh. With consistent care, your makeup sponge will blend foundation better, waste less product, and stay in better condition for everyday use.