Watching a solar eclipse is unforgettable, but eye safety must come first. If you are searching for how to make eclipse glasses, the most important fact is this: you should not make the protective lens material yourself. Regular sunglasses, smoked glass, camera film, CDs, DVDs, candy wrappers, exposed photo negatives, and stacked dark plastics are unsafe for direct solar viewing. They may look dark, but they can still let harmful infrared and ultraviolet radiation reach your eyes.
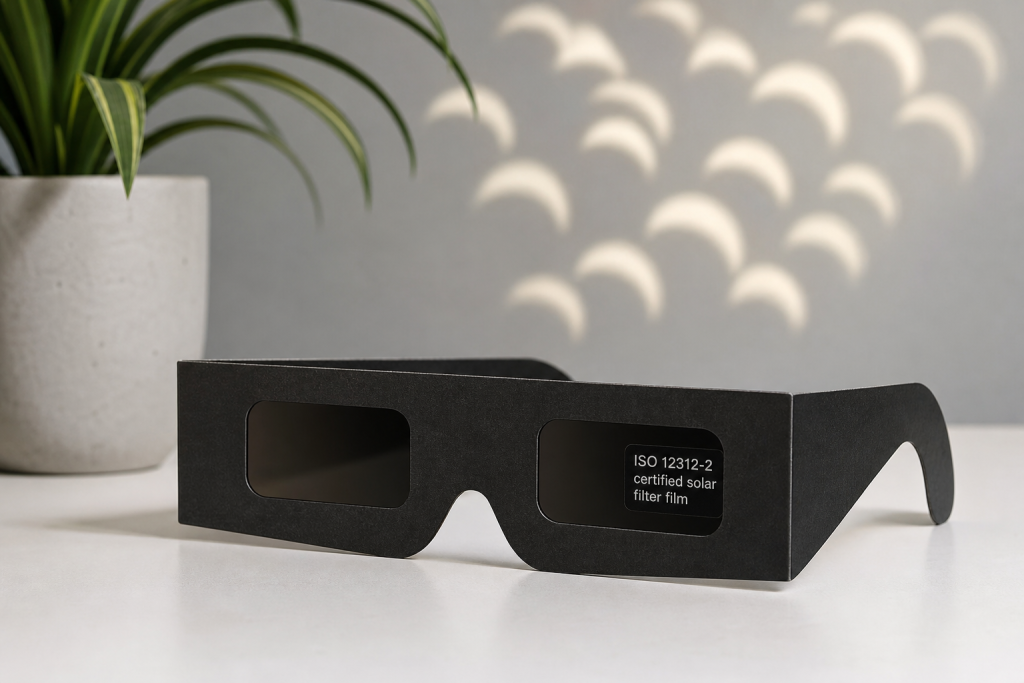
Introductory illustration
Safe homemade eclipse glasses are possible only when you use certified solar filter material designed for direct solar observation. In other words, you can build the cardboard frame yourself, but the filter must be a proper ISO 12312-2 compliant solar viewer filter from a trusted supplier. This guide explains what is safe, what is not, how to assemble a sturdy pair, and how to inspect your glasses before eclipse day in the United States.
Can You Make Eclipse Glasses at Home?
Yes, but with one strict condition: homemade eclipse glasses must use certified solar filter film or lenses made specifically for viewing the Sun. The DIY part should be limited to the holder, frame, and fit. The optical protection must come from tested material that meets the ISO 12312-2 international safety standard for direct solar viewing.
This distinction matters because solar injury can happen without pain. The retina has no pain receptors, so a person may look at the Sun through a poor filter and feel fine in the moment, only to notice blurred vision, distorted spots, or central vision damage later. This is why NASA, the American Astronomical Society, and eye safety experts consistently warn against improvising eclipse filters from household items.
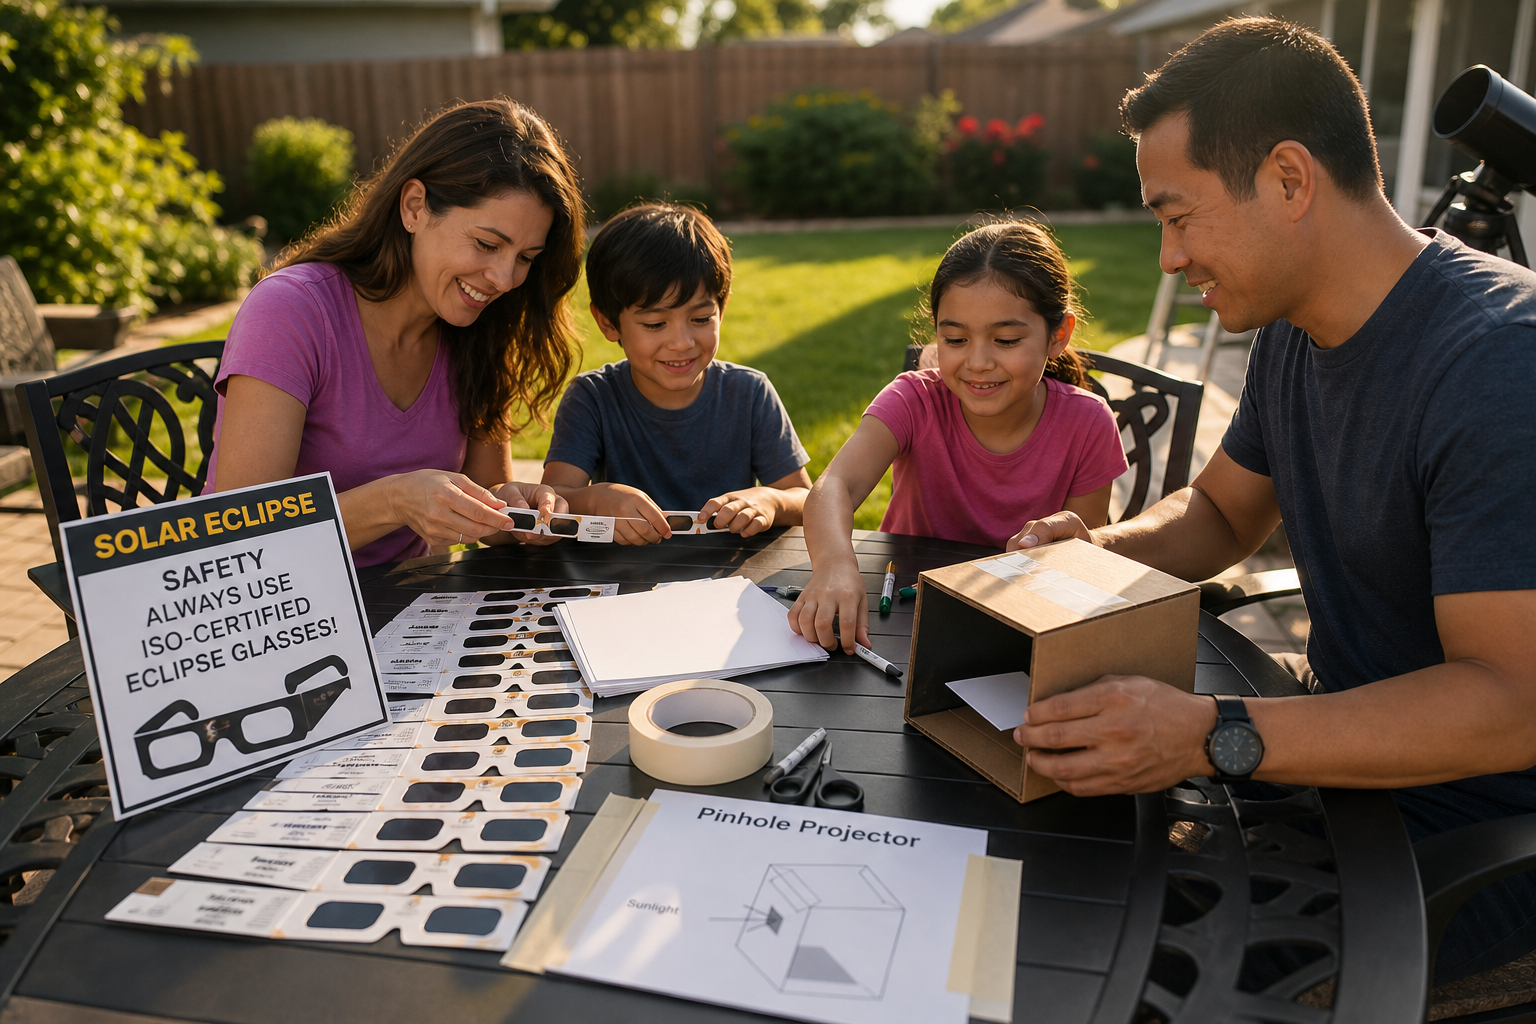
For most people, buying ready-made eclipse glasses from a reputable seller is easiest. However, making your own cardboard viewer with certified solar filter sheets can be practical if you need a better fit over prescription glasses, want a classroom craft, or are preparing for a community eclipse event.
Safe Materials for DIY Solar Eclipse Glasses
Before cutting cardboard or printing templates, gather the right materials. The filter is the critical part. Everything else is only there to hold the filter securely in front of both eyes.
Required Materials
-
ISO 12312-2 certified solar filter film or replacement lenses from a reputable eclipse glasses supplier.
-
Thick cardstock or cardboard, such as poster board, cereal-box cardboard doubled up, or craft cardstock.
-
Scissors or craft knife for cutting frame pieces.
-
Tape or glue strong enough to seal edges fully.
-
Printed glasses template or hand-drawn frame shape sized for your face.
-
Ruler and pencil for accurate eye-hole placement.
Materials You Should Never Use
-
Regular sunglasses, even very dark ones.
-
Polarized sunglasses.
-
Welding glass unless it is shade 14 and verified safe for solar viewing.
-
Smoked glass or soot-covered glass.
-
Exposed film, X-ray film, or photo negatives.
-
CDs, DVDs, floppy disks, foil, or snack wrappers.
-
Camera neutral density filters not rated for direct solar viewing.
These substitutes are dangerous because visible darkness does not equal solar safety. A filter can block bright light while still passing invisible radiation that harms eyes.
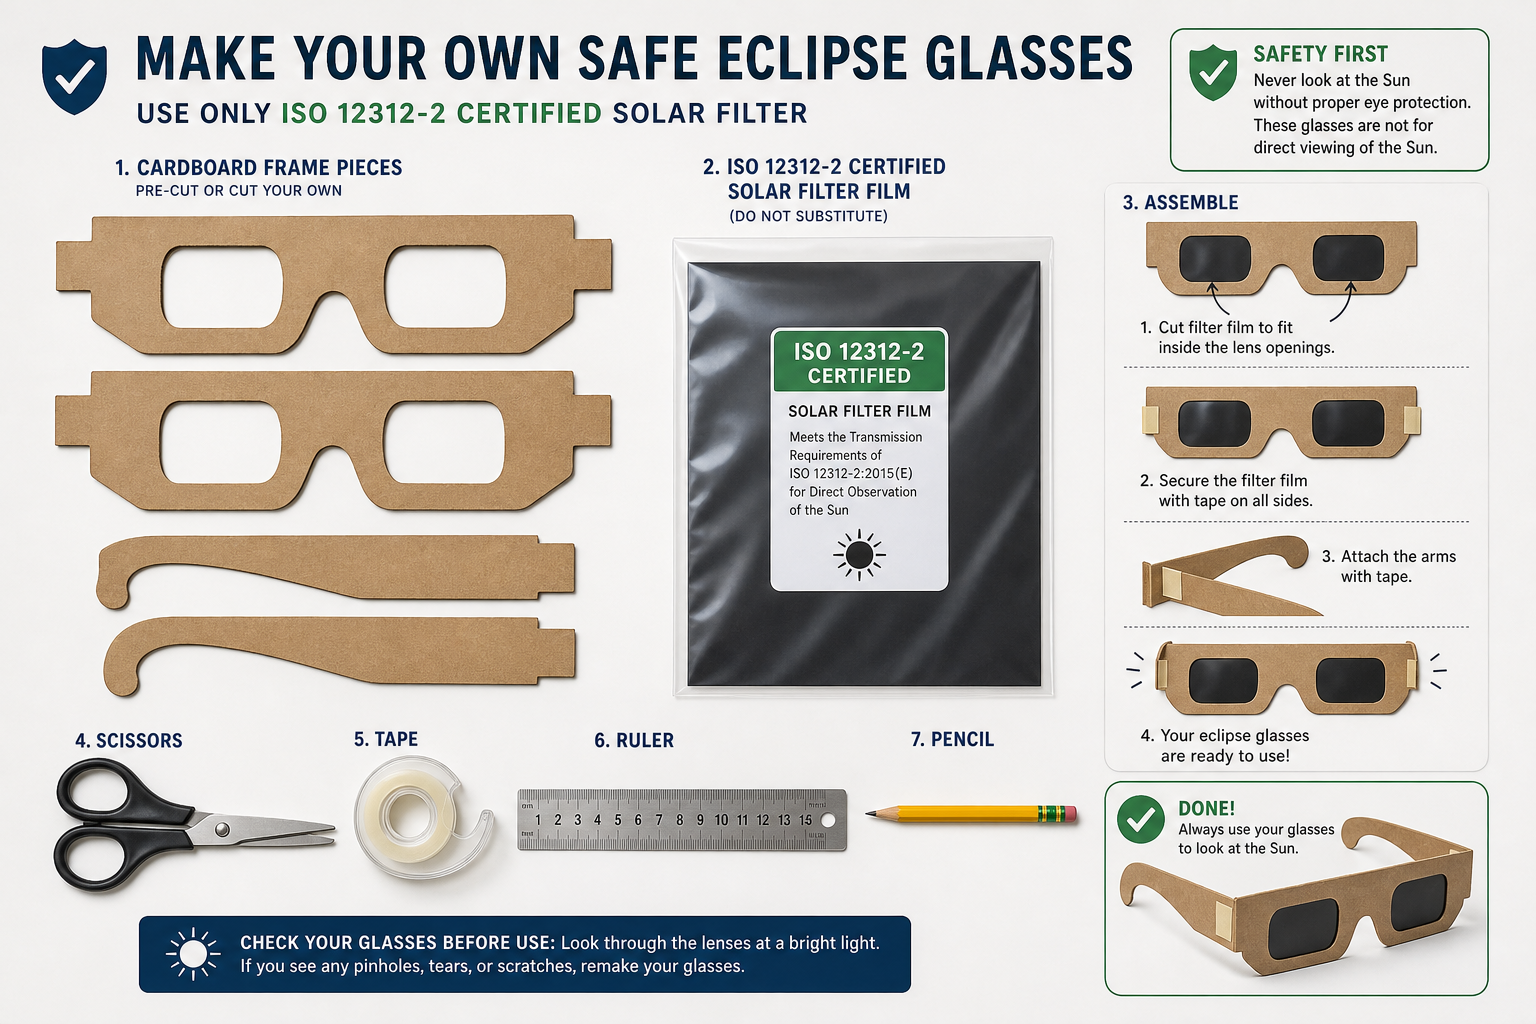
How to Make Eclipse Glasses with Certified Solar Film
Use this method to build a simple cardboard frame. Work slowly and avoid scratching, creasing, or puncturing the solar film. Damaged film should be discarded.
Step 1: Choose Certified Solar Filter Material
Buy solar filter film from a trusted astronomy retailer, science supplier, museum store, planetarium, or manufacturer listed by recognized eclipse safety organizations. Look for clear labeling that states compliance with ISO 12312-2. If the product has no manufacturer name, no standard, no instructions, or suspicious marketplace branding, do not trust it.
In the U.S., counterfeit eclipse glasses have appeared before major eclipses. Packaging alone is not enough. Prefer known brands and sellers with astronomy credibility. If possible, cross-check supplier information with American Astronomical Society eclipse safety resources.
Step 2: Make a Cardboard Frame
Draw a glasses shape on cardstock. The frame should be wide enough to cover both eyes completely and tall enough to block sunlight from entering around the filter area. If the glasses are for a child, size them carefully so the eye openings line up without forcing the child to tilt or peek around edges.
Cut two identical front frame pieces. Double-layer construction is better than a single layer because the solar film can be sandwiched between cardboard pieces, reducing the chance that it peels away during use.
Step 3: Cut Eye Openings
Cut two eye openings in both cardboard layers. Each opening should be smaller than the pieces of solar film you plan to attach. Leave enough border around each hole so tape or glue can secure the film without covering the viewing area.
A good target is to make the solar film overlap the cardboard by at least half an inch on all sides. This overlap helps prevent light leaks and makes the finished glasses stronger.
Step 4: Attach Solar Filter Film
Place certified solar film over the eye openings on the inside of one frame layer. Do not stretch the film tightly, and do not press hard on it. Some solar film naturally looks slightly wrinkled; that is normal if it is not torn or punctured.
Tape all edges securely so there are no gaps. If using glue, keep glue away from the viewing area and let it dry completely. Then place the second cardboard frame layer over the first, sandwiching the filter material between them. Tape or glue the frame layers together around the full perimeter.
Step 5: Add Side Arms or a Handheld Handle
You can add foldable side arms like regular glasses, but many homemade versions are sturdier as handheld solar viewers. For children, a handheld design may be safer because an adult can supervise use more easily. If you add side arms, make sure the glasses sit flat against the face and do not slide down.
For extra protection, add side shields made from cardstock to reduce stray sunlight. This helps viewers avoid accidentally looking around the filter when turning their head.
How to Test Homemade Eclipse Glasses Before Use
Detailed illustration
Inspection is mandatory. Do not wait until the eclipse begins. Test your glasses indoors and outdoors before event day.
Indoor Light Test
Put the glasses on and look at bright indoor lights. With proper solar viewing film, ordinary lamps should appear extremely dim or not visible at all. If you can see household light fixtures clearly, the filter is not dark enough for direct solar viewing.
Physical Damage Check
Hold the glasses at arm’s length and inspect both filters. Look for pinholes, scratches, cracks, tears, separated tape, loose glue, or light leaks around the edges. If you see any damage, discard the glasses. Do not repair damaged solar filter film with tape.
Short Sun Test
When testing outdoors, put the glasses on before facing the Sun. Look only briefly. The Sun should appear as a comfortable, sharply defined disk, usually white, orange, or yellow depending on the filter type. If the view is painfully bright, hazy, uneven, or uncomfortable, stop using the glasses immediately.
Safety rule: put eclipse glasses on before looking up at the Sun, and look away before removing them.
Eclipse Glasses vs. Pinhole Projector
If you cannot get certified solar film, make a pinhole projector instead of direct-view glasses. A pinhole projector lets you watch the eclipse indirectly by projecting sunlight onto a surface. It is safe because you are not looking at the Sun itself.
A basic pinhole projector can be made with two pieces of white cardstock. Make a tiny hole in one sheet, stand with your back to the Sun, and let sunlight pass through the hole onto the second sheet. During a partial eclipse, the projected dot becomes a crescent. This method is excellent for classrooms, families, and large groups because multiple people can observe without sharing eyewear.
However, a pinhole projector is not the same experience as direct solar viewing. You will not look at the Sun through it, and you should never use it like a telescope or binocular viewer. Keep your eyes on the projected image, not on the Sun.
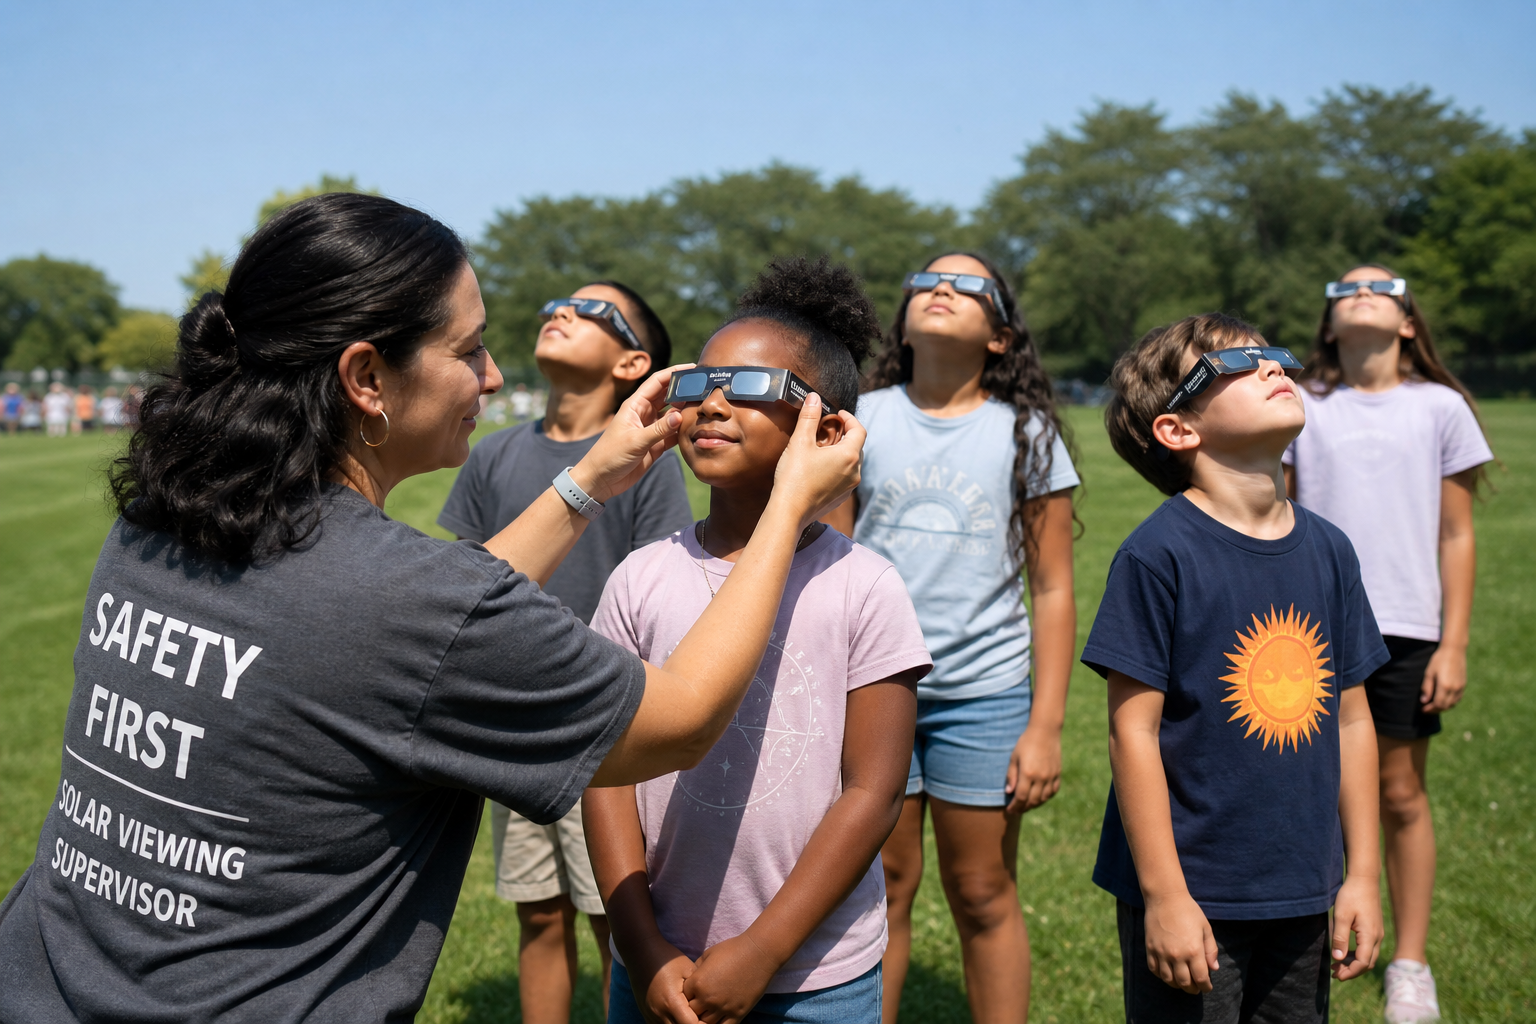
Rules for Safe Solar Eclipse Viewing in the U.S.
Across the United States, eclipse events often happen in parks, schools, libraries, science centers, and backyard gatherings. Crowds, excitement, and children can make safety harder to manage, so clear rules help.
-
Use only ISO 12312-2 certified eclipse glasses or solar viewers for direct viewing.
-
Supervise children every time they use solar viewers.
-
Do not look through cameras, binoculars, telescopes, or scopes while wearing eclipse glasses unless those devices have proper front-mounted solar filters.
-
Do not use eclipse glasses with optical devices. Concentrated sunlight can burn through filters.
-
Remove glasses only during totality if you are inside the narrow path of totality and only when the Sun is completely covered.
-
Put glasses back on as soon as any bright part of the Sun reappears.
For partial eclipses, annular eclipses, and all moments outside totality, eclipse glasses stay on. During an annular eclipse, the “ring of fire” still means the Sun is visible, so direct viewing without proper protection is unsafe at all times.
Common Mistakes When Making Solar Viewers
Related context illustration
Using Dark Plastic Instead of Solar Film
This is the most dangerous mistake. Dark plastic may reduce glare but fail to block harmful invisible radiation. Never use it for eclipse glasses.
Leaving Gaps Around the Filter
Small side gaps can allow direct sunlight into the eye, especially when someone moves their head. Seal filter edges fully and use a frame large enough to cover the eye area.
Letting Kids Craft Without Final Adult Inspection
DIY eclipse viewers can be a fun science project, but final approval should come from an adult who checks filter certification, attachment, and damage. Children should not be responsible for deciding whether solar film is safe.
Reusing Old Eclipse Glasses Without Checking Them
Some modern certified eclipse glasses remain usable if they are undamaged and stored properly, but scratched, bent, punctured, or peeling glasses should be discarded. If instructions printed on the product specify a limited use period, follow those instructions.
Where to Get Certified Eclipse Glasses and Solar Film
In the U.S., reliable sources often include astronomy stores, science museums, planetariums, public libraries during eclipse campaigns, school science suppliers, and established manufacturers. Big online marketplaces can be convenient, but they also require caution. Check seller reputation, manufacturer details, certification claims, and product reviews carefully.
If you are organizing an event, order early. Before major eclipses, safe solar viewers often sell out. Bulk purchases should come from verified suppliers, not unknown resellers with vague listings.
Final Verdict: Safe DIY Is About the Filter
Learning how to make eclipse glasses is useful only when safety is built into the plan. Homemade frames are fine. Homemade solar filters are not. Use ISO 12312-2 certified solar filter film, secure it inside a sturdy cardboard frame, inspect it carefully, and supervise children during every viewing session.
If certified filter material is unavailable, choose an indirect pinhole projector instead. The eclipse will still be exciting, and your eyes will stay protected. A safe viewer makes the experience better because everyone can focus on the rare sky event without risking permanent vision damage.